Description
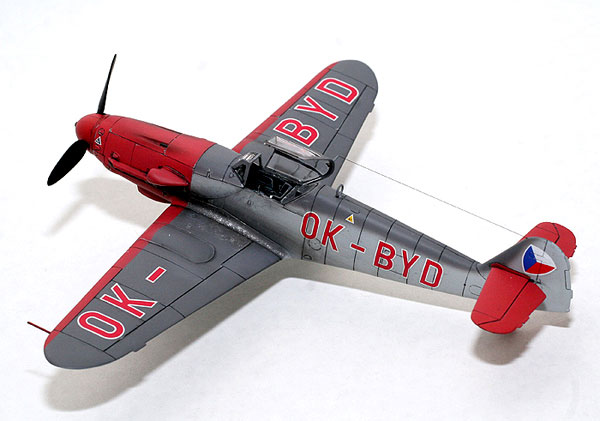
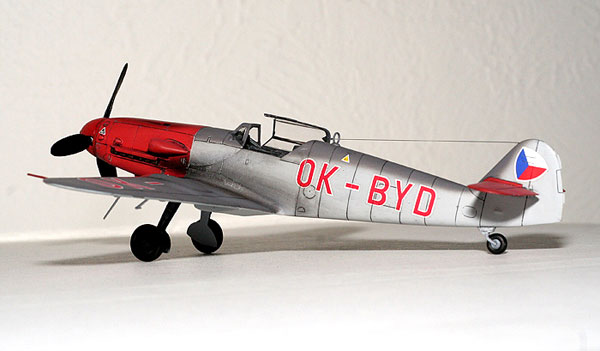
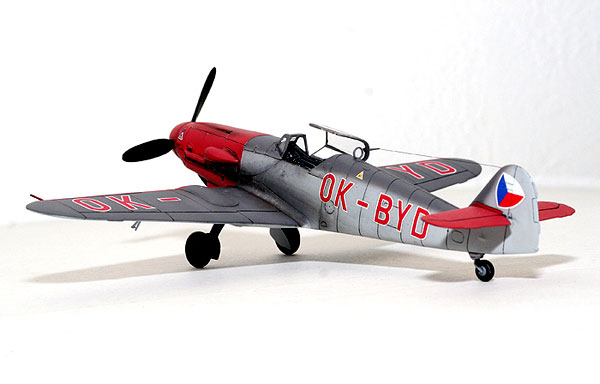
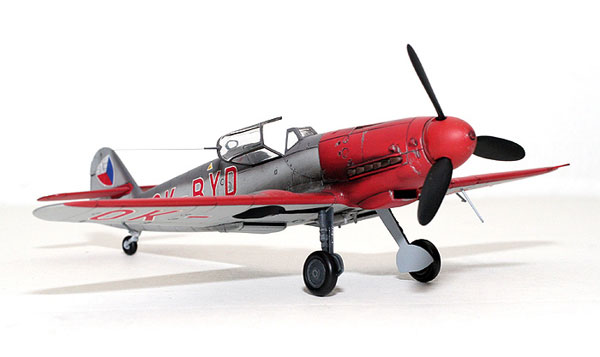
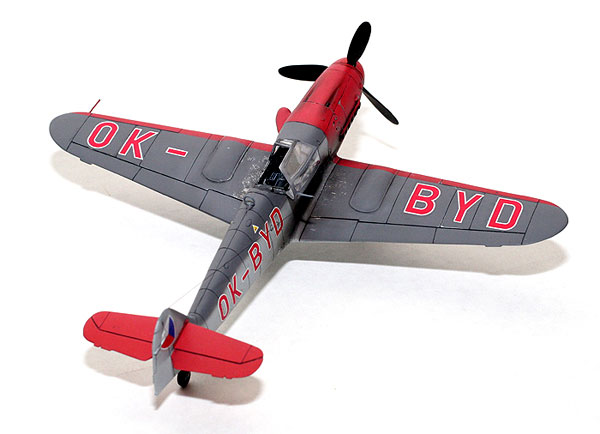
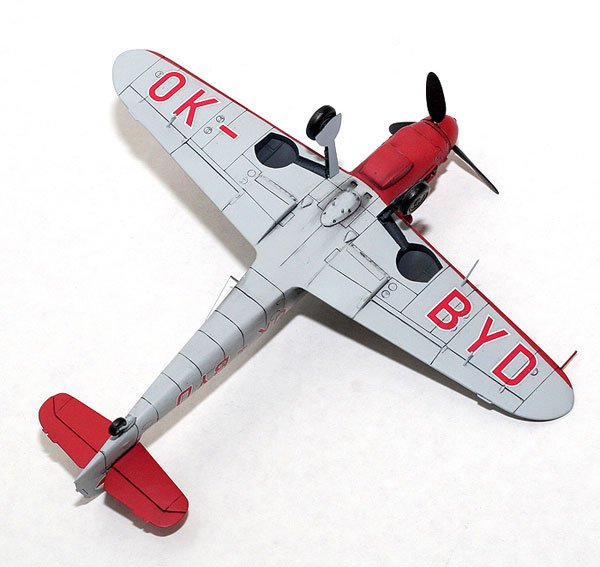
Here is my 1/48 scale Avia S-99, based on the old very nice Monogram
Messerschmitt Bf 109G-10 kit.
The Germans were originally producing the Bf-109G-10 in
Czechoslovakia towards the end of the war, and when the war ended
the Czechs simply picked up production where the Germans left off.
There were only a few S-99s built before the warehouse holding the
Daimler-Benz engines burned to the ground and necessitated the
adaptation of the Bf-109G airframe to take the Junkers Jumo engines
originally intended for He-111 bombers, resulting in the nasty S-199
which everyone immediately hated.
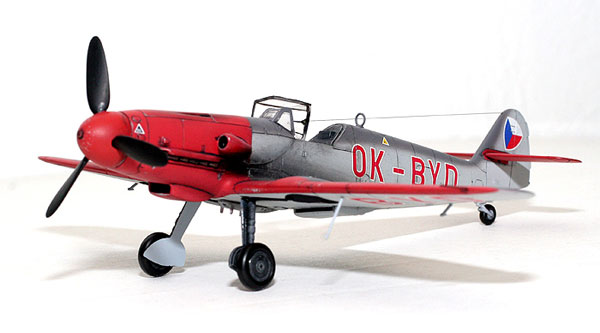
Since the factory that produced these airframes was originally
German, I applied German colors throughout. I painted the cockpit
and wheel wells RLM66 -- mainly because I didn't feel like cleaning
out my airbrush to spray RLM02 on the wheel wells. Per the
instructions, I painted the airplane RLM77 under RLM75, and the red
parts are RLM23 Red, all Polly-Scale colors (actually, to be
completely honest, I couldn't find any Polly-Scale RLM77 and a
friend told me that Light Ghost Grey would work fine, so I used that
-- it looks good enough to me). Breaking from the German tradition
(and because I have no sources for Czech fighters), I did paint the
propeller black.
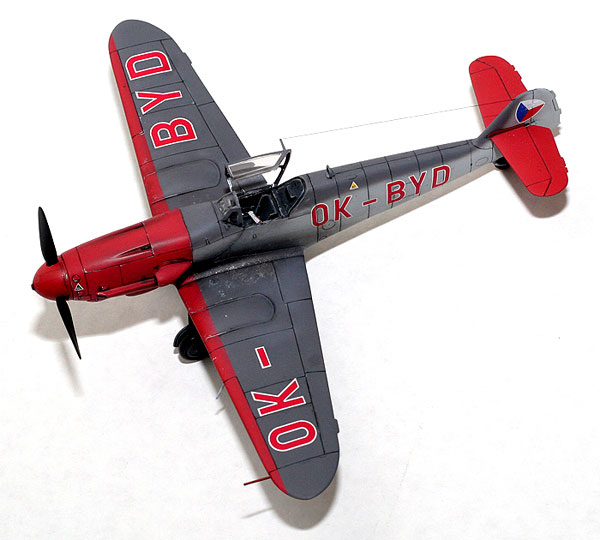
The Tally Ho! decals went on flawlessly. A half-solution of
Solvaset and water makes the decals snuggle right into the surface
beautifully. After gloss-coating the model with Polly-Scale Gloss, I
applied first the white surrounds and the tail insignia, and then
once that was mostly set up I applied the red parts of the codes. I
then sliced the panel lines with a hobby knife and applied a little
more setting solution to make the decals set into the panel lines.
After the codes were on, I applied the rest of the small decals.
A little Polly-Scale Flat -- the best flat coat on the planet --
and the decals were finished.
And then the rest of the build, which of course went basically
perfectly since it's the Monogram kit!