Construction
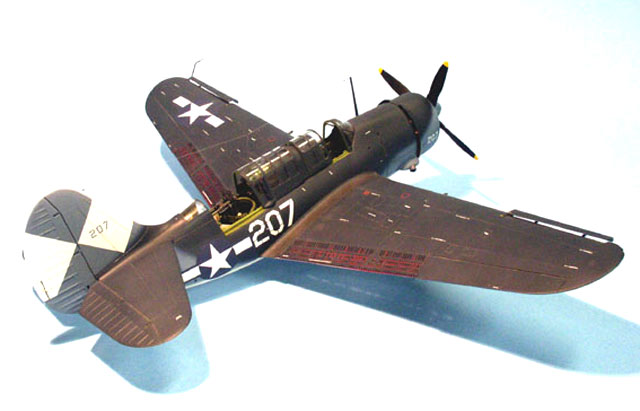
This is the 1/48 Pro-Modeler kit I built a couple of years ago.
The decals are from Aeromaster’s “The Beast Pt. 1” and their
Helldiver stencil set.
I can never seem to build a kit out-of-the-box without adding a few
little embellishments and such is the case with this model. Much has
been written about this excellent kit so I’ll not go into the
mundane construction details except to say that careful dry fitting
is necessary when assembling the cockpit pieces, especially the
rear. The instruction drawings are somewhat vague as to placement
and I did need to do some minor trimming, but others may not run
into that.
As for the extra touches, these include drilling out the formation
lights under the starboard wing and adding new ones formed with
epoxy and painted with Tamiya tinted clear paints, drilling out the
wing cannon shell ejector ports, drilling out the holes in the dive
flap interiors (tedious!!), and removing the solid sides from the
pilot’s set and replacing with copper wire. I also scratch built the
Yagi antennas and the bomb racks as I thought the kits looked a
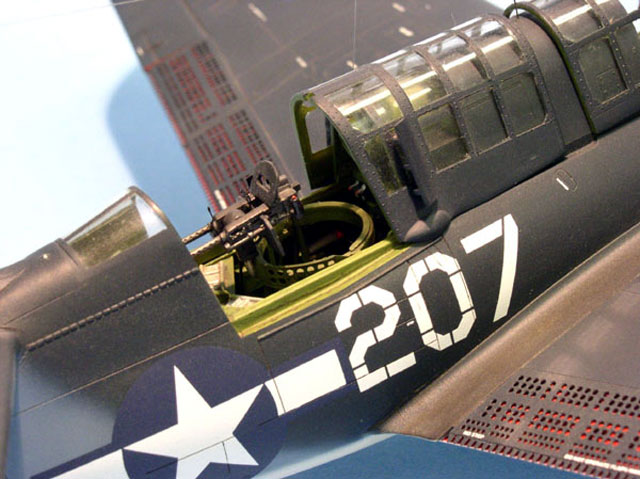
little “clunky”. Since the rear machine guns are so prominent, they
also received extra detail in the form of some wiring and extra
armor plating.

I exercised a little “modeler’s license” as I didn’t want to
leave the life raft container empty (the big tube just above the
radio equipment in the rear). I had no picture to tell what the
actual contents looked like so I cut a 1” or so square of rubber
from a yellow party balloon, rolled it up, dipped it in Future, gave
it a good dose of brown wash, and shoved it into the container.

Painting, Weathering and Markings
The paints used were Floquil enamels.
After the painting was done, I applied a gloss coat, using
Floquil Crystal Coat, applied the decals, and when dry, sealed them
with another gloss coat. I prefer to go very easy with the
weathering. I followed the gloss coat with a light overall brownish
wash using artist paint (I can’t remember if it was oil or water
based, I use both). I also used some heavier wash to do a little
staining on the underbelly. I then applied a flat clear coat using
Testors Dullcoat. Finally, to give a slight faded appearance, I
mixed a tiny bit of gray paint in with some more Dullcoat and
sprayed it lightly on the upper surfaces of the wings and tail.

This model was also the first time I used EZ Masks for the canopy
and I was instantly hooked. I was able to mask all of the canopy
parts in about an hour where my usual technique involving strips of
masking tape would have taken several evenings of tedious labor.
I’ve since purchased EZ Masks for just about every model I have that
has a greenhouse type canopy. A word of advice for those who are
thinking about giving them a try someday: be sure to follow the
instructions regarding dipping the masks in soapy water before
applying them. This makes placement and removal much easier. My
masks stayed on for many days and came off with no problem.
Oh, for those who are concerned about such things, yes, I did sand
off the copyright information under the tail!