Background
Regrettably, I had never built a Spitfire in 1/48th scale and I
had always wanted a model of the Griffon engine version so the hunt
was on for a suitable model.
My choice was the Spitfire F. Mk. 18, the so called "Super
Spitfire" as it was the final Spitfire mark using the original
elliptical wing. I ended up choosing the 1/48 Academy XIVe kit to
convert into a Mk. 18 Spitfire as this seemed appropriate. This
aircraft did not see W.W.II service but was used in the
Anti-terrorist war activities in Malaya during the 1950's.
The aircraft's role was mostly support missions for ground troops
where they conducted operation Firedog missions to raid terrorist
camps. Aviation artist Jim Mitchell, produced a very dramatic
painting of two (2) 60 Squadron Spits flying low & very fast over a
village which was a major inspiration for this project.
Building the Model
The model that I chose to build the Super Spitfire FR MkXVIII was
the Academy Spitfire XIVE in 1/48th scale as it was the only game in
town.
Unfortunately, this kit has had a lot of bad press for being
inaccurate in outline and shape etc... from many of the Spitfire
buffs. But I found the kit an excellent build; challenging to say
the least. When I viewed this model in the box it had finely
engraved panel lines and it was molded in grey plastic. A very nice
kit and it lends itself to correction work easily. The FR Mk 18
version of the Spitfire was the last Spitfire with the original
classic elliptical wing and with the overall shape I was fairly
pleased with Academy's representation.
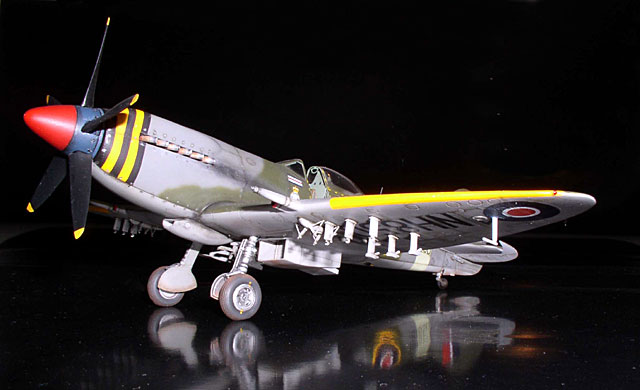
However the fuselage looked a little tall, cowling/rocker covers
incorrectly shaped and the spinner large........but I think with a
little work eventually it looks like a Spitfire; what do you guys
think?
To build the MkXVIII the Academy Spitfire was going to mean some
sort of conversion/correction set was going to be needed to handle
the kit corrections and enlarged rudder. At the time the only
accessible conversion set was the KMC set (48-4021) for the Spitfire
MkXIV c/e (regrettably no longer available) which does assist in the
correction of the deficiencies of the original kit. Additionally,
this Spitfire was to have a ground attack configuration to include a
center line bomb rack, six (6) outer wing zero length rocket rails
and smaller wing bomb racks.
To help me with the fabrication of these I called upon the
assistance of the master modeler Roy Sutherland of Cooper Details
fame, a highly experienced modeler who was very kind enough to help
me with the resin molding of my bits and pieces for this project.
THANKS ROY!
As fate would have it, at the end of my project, AeroMaster Decals
just happened to release a decal sheet (48-527) with the markings
for Number 60 Squadron in 1950's in particular Sqn. Ldr. W G Duncan
Smith aircraft. This made my job a lot easier and another major
motivation to complete this Spitfire project.
Fuselage
Firstly, I had to remove all the side wall detail from the
Academy kit to allow the KMC cockpit side walls and floor to fit. I
did have some problems with the fit of the floor but with a little
persistence I managed to get it to fit snugly. Then the plastic
above the exhausts to include the cowl and rocker covers was removed
and plastic card used to make the exhaust stacks position deeper
within the fuselage side wall; so as to match photographs.
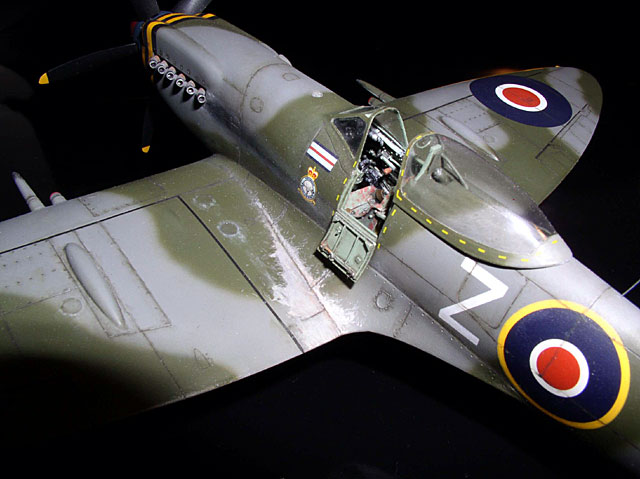
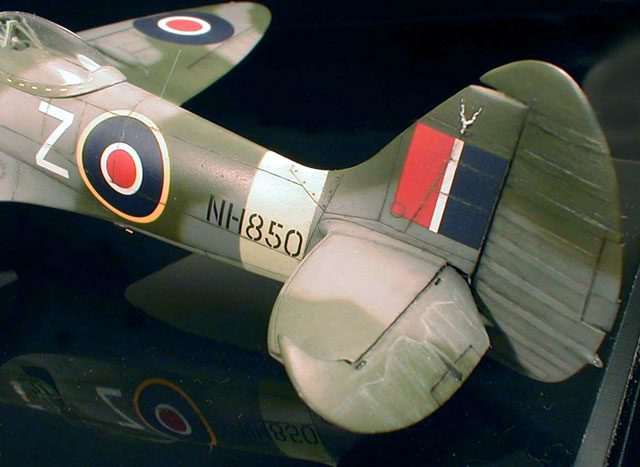
The rudder was also sawn off to allow for the conversion into the
Mk 18 and installation of KMC's new rubber. I did have to re-drill
all the large rivets around the replacement cowl and fill the holes
with punched plastic card discs to form rivets. These large rivets
are very prominent and need to be shown. Once the fuselage was
closed it started to look like a Rolls-Royce Griffon engine
Spitfire.
Cockpit
The KMC cockpit required a lot of trimming and the side walls of
the kit thinned down to allow the fuselage to close properly.
Additionally, I used the Eduard photo-etch (48-179) for the spit
MkXIVc set to help with some of the framing and instrument panel
details. Sutton harness was made from scratch and very thin soldier
and thick aluminum foil. The whole cockpit area was painted in
British interior grey-green and highlights and dry brushed to bring
out the details. A Squadron canopy was used to replace the kits one
which really improves the look of this area.
Wings
The wings of the Academy kit were modified to provide for a much
deeper appearance for the wheel well providing suitable recesses for
the main wheels.
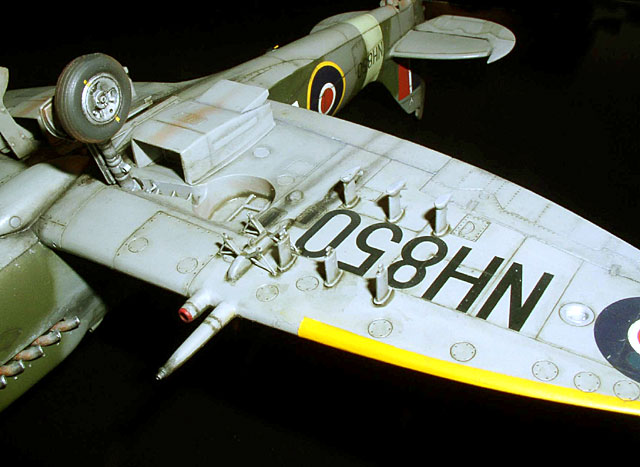
The outer wing guns were removed and the 20mm
Hispano resin cannons and .50 cal flaring installed. Resin zero
rocket rails, bomb rack parts and bumps under the main wing were all molded by Roy Sutherland from patterns made by me.
Undercarriage
The kit undercarriage was used and detailed with a little
assistance from the Eduard photo-etch set. Brake lines were
installed using copper and fixed to the beautiful three (3) spoke
main wheels from Cooper Details.

Painting and Markings
The paints used were Testors Polly Scale the usual (sea grey/dark
green/medium sea grey) mix and were all sprayed through the trusty
old Badger 150. No spray mask was used for the camouflage pattern as
I like the softer edge to the pattern. I could go on about the sharp
edge of the camo pattern but I wana try and keep this article to a
minimum. I don't care too much for the sharp edge but that's a
personnel issue.
The decals from AeroMaster were satisfactory but I did have some
trouble with the black & yellow bands around the nose. After
repeated failures I choose not to use them and painted them on
instead.
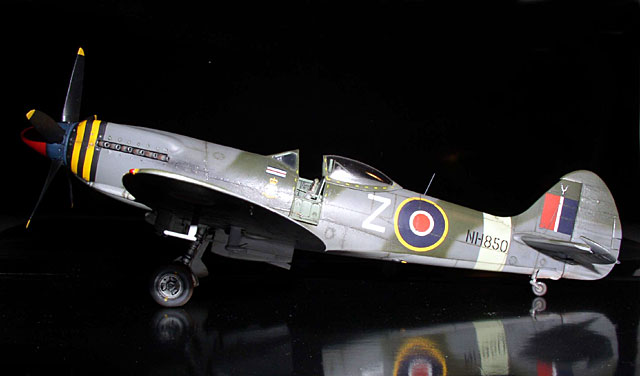
After the decals had time to dry I then weathered the aircraft with
oils & pastels to bring out and represent a slightly used look.
Personally, I don't care for the heavy pre-shaded look I
guess................I seem to have much get better control with the
oils. Then the model weathering was completed it was given a final
coat of Future/Polly-Scale mix for a semi-gloss finish and I had a
Spitfire FB Mk 18 for my collection. Hope you fokes like it!

References