
Hasegawa's 1/32 scale
Messerschmitt Bf 109G-6
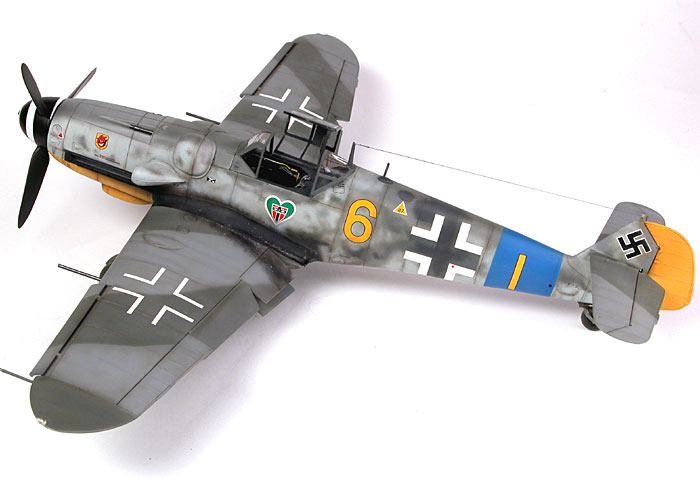
by Brett Green

Introduction
I made a New Year's Resolution on the last day of 2003 to finish
this kit as soon as possible. I have been working on it since
October 2002, on and off.
The model is Hasegawa's 1/32 scale Messerschmitt Bf 109G-6 built
using Cutting Edge's resin cockpit set and finished in EagleCals
decals. This is the model that I used as the subject for the
ScaleWorkshop Video series, which may
be downloaded elsewhere on Testor's ScaleWorkshop.

The Challenges of
Finishing...
I had nearly finished this model in December, and sat down
in early January to apply what I expected to be a few hours worth of
finishing touches. Within minutes, I had smeared glue on the painted
fuselage while gluing on the rear canopy section, lost the antenna
mast and broke off both bottom radiator flaps. I was not especially
happy with the exhaust stain that I had added earlier either.
This short session quickly sapped my enthusiasm. Sometimes the
best option is to put a model aside and wait for the curse to lift.
This was one of those occasions.
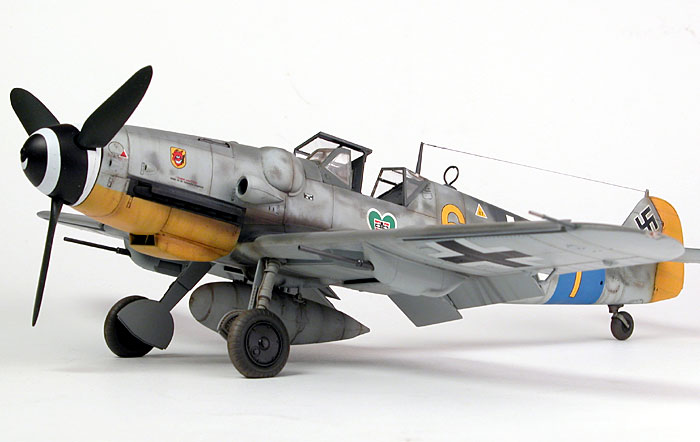
Over the course of several subsequent modelling projects, the 95%
complete 109G-6 sat in full view collecting dust. Its very presence
seemed to be a mute challenge for me to make another attempt to
finish it.
Late in March I found the missing antenna mast on my workshop
floor. A good omen at last!
At the first opportunity (which just happened to be today), I
gathered the bits and pieces required to repair and complete my
large-scale Gustav. First, the rear canopy section was masked and
the smear of glue was removed with light sanding. This area was then
resprayed and given a flat coat to blend the repair with the
surrounding paint.
Next, gun barrels were drilled out. I started by using the point
of a scriber to locate the centre. A shallow hole was then drilled
in the end of each barrel using a pin vise. The barrels were painted
Testor's Gunmetal Metalizer.
I decided that the wings looked a little clean compared to the
reference photo on the EagleCals instruction sheet so I painted a
random mottle of a slightly lighter shade of RLM 75 Grey Violet,
then sprayed a heavily thinned black-brown mix in random streaks
from the front to the back of the wings and stabilisers. The same
mix was used to add some vertical streaks to the engine cowl, and to
highlight a few additional panel lines.
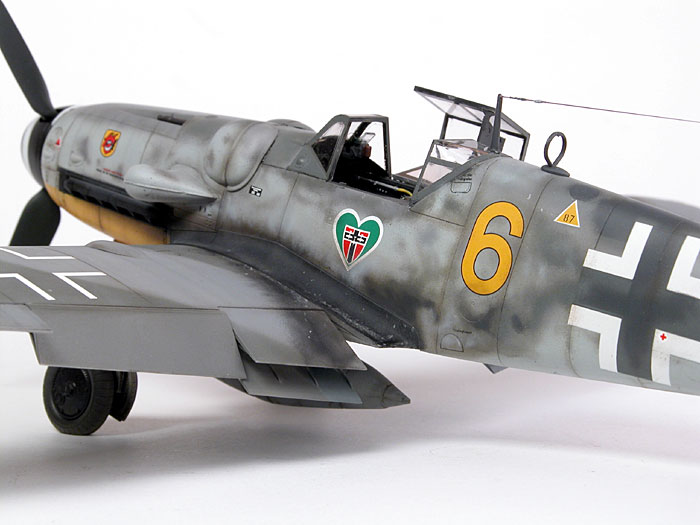
The exhaust stain on the model was difficult to distinguish from
the camouflage mottle. I decided to modify the stain to better
reflect the reference photo. Polly Scale RLM 76 was sprayed on the
fuselage side, over the top of the higher sections of the exhaust
stain but carefully avoiding the camouflage mottles and decals that
were in place. A thin mix of Flat Black was then sprayed onto the
wing root, fanning out over the top of the radiator flap, as seen in
the reference picture.
With the paint repairs and improvements completed, it was time to
add the final parts to the model. First, though, I drilled a small
hole near the top of the aerial wire post on top of the fin. A
length of elasticised E-Z-Line was then superglued to the top of the
aerial mast. The mast was glued to the rear of the canopy and left
to dry before the other end of the E-Z-Line was threaded through the
hole in the fin, and secured with a spot of super glue. When the
super glue was set, the excess thread was cut off with a new hobby
blade.
Installation of the mass balances, navigation lights, gun sight,
canopy, bottom radiator flaps and gun barrels completed the job.

Here is one we
prepared earlier...
Painting, weathering and markings of this model have been covered
in the ScaleWorkshop Video series, but it might be worth recapping
some of the accessories used to enhance the model:
Cockpit
The model was fitted with Cutting Edge's 1/32 scale resin
replacement cockpit. This is a simple yet very effective set, and
represents a great improvement over the kit cockpit parts. Cutting
Edge's cockpit offers the choice of a seat with a cast-on resin
harness, or a plain seat with separate flexible resin harness
straps. I chose the latter option.
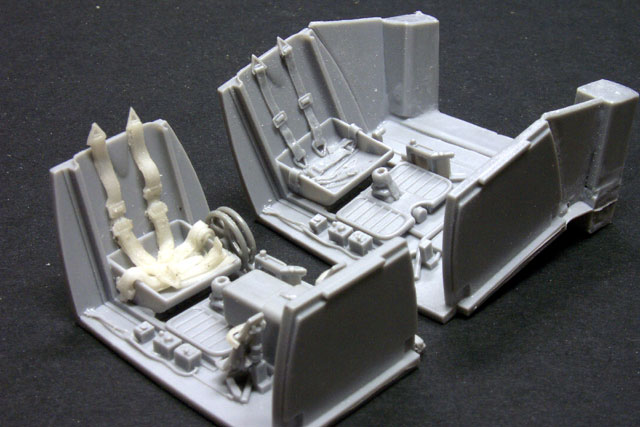
For complete details on the preparation, assembly
and installation of Cutting Edge's 1/32 scale cockpit into this kit,
see the Review on HyperScale.

 Painting,
Masking and Markings
The model was painted using Polly Scale acrylic
paints through my Aztek A470 airbrush.
The camouflage pattern was masked with Black Magic self-adhesive
vinyl masks. Small blobs of Blu-Tack were used to
lift the edges of the masks off the surface of the plastic.
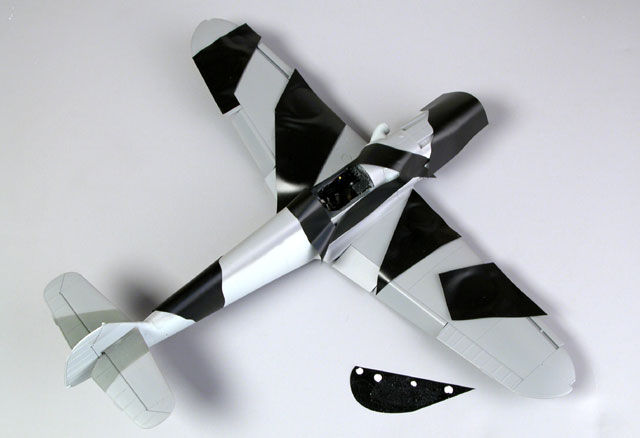
The camouflage mottle was applied according to the reference photo supplied with the Eagle Cals decal sheet.
The mottle on the fuselage sides appeared to have endured much
repair and respray. The main camouflage colours were RLM 74 Grey
Green, RLM 75 Grey Violet and RLM 76 Light BLue, but some unusual
colours appear to be present too. I interpreted these as either a
very dark version of RLM 74 Grey Green, or possibly RLM 66 Black
Grey; plus an unspecified light grey in several patches.
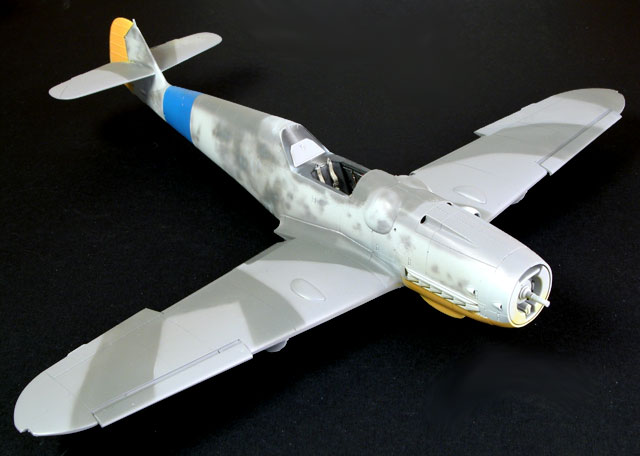
EagleCals' decal sheet #41 was used for this project. I could not
resist the colourful markings of "Yellow 6", attached to 9./JG 54
during February 1944. The decals were thin and in perfect register.
They performed beautifully on the model too, conforming to the
recessed panel lines very well.
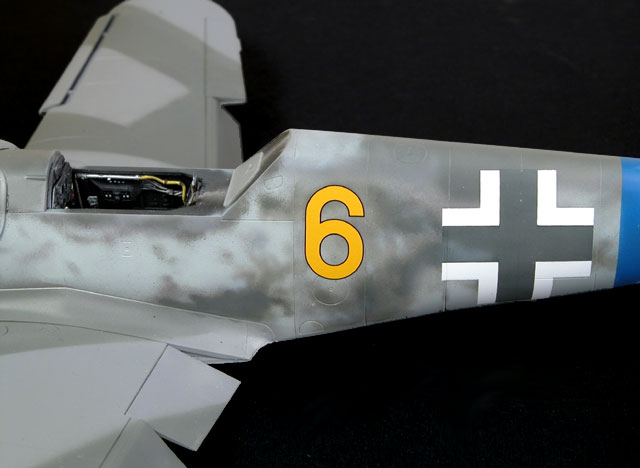
The instructions for this sheet are excellent. The close-up
wartime photo and accompanying notes were invaluable references for
the painting as well as the application of the decals.

Conclusion
This model was built over a long period of time, but
not because the kit was difficult or frustrating.
For the first year or so I was pacing construction
to permit recording of various stages for the Testor Video Workshop
series. The small challenges that popped up early this year were
entirely of my own doing and not the fault of the kit.
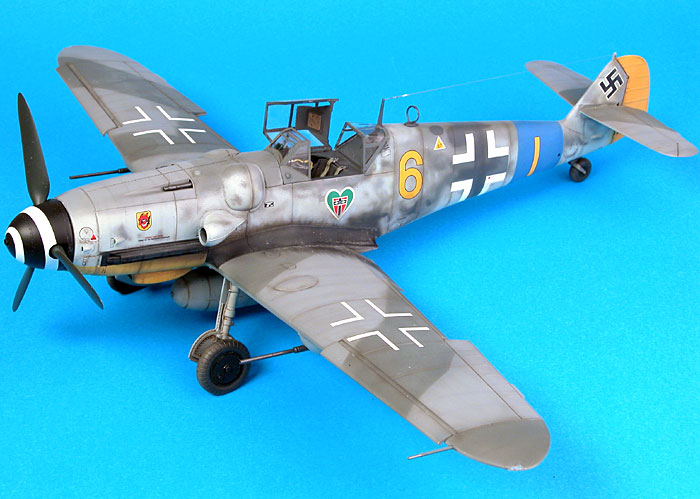
In fact, I rate Hasegawa's 1/32 scale Messerschmitt
Bf 109G-6 as one of my all-time favourite models. It is simple to
build, adequately detailed straight from the box but a fantastic
platform for superdetailing, fits almost perfectly, is accurate in
most of the important areas and offers an unparalleled choice of
finishes. It is also a good size - not too big, but impressive when
finished nonetheless.
There will definitely be more 1/32 scale Hasegawa
Gustavs in my future!

More Pictures
Click the thumbnails below to view larger pictures:
Home
What's New
Showcase
Workshop
Products
About Testor
Search
Links