Introduction
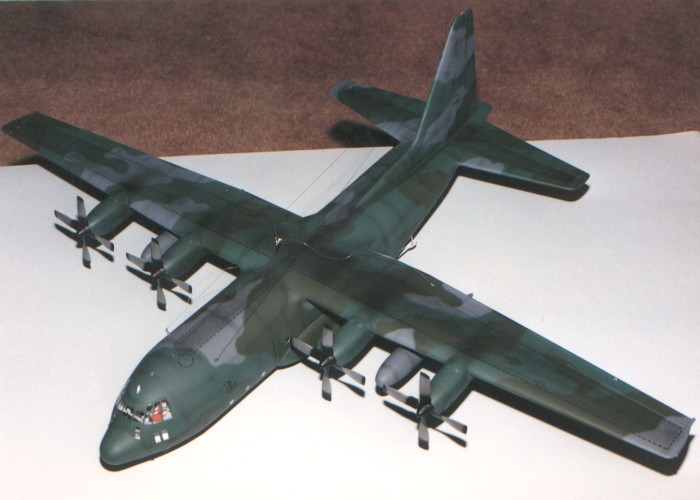
This was my fourth time building the Testors kit. This was a
contract job for a C-130 crew person, a loadmaster. This was one of
several models this guy had me build (mostly C-130's) so they could
hang over the wet-bar in his basement. This one was his prize,
though.

The Kit
In a previous posting, I discussed the exterior details of this
huge kit. This posting will discuss the interior portions of the
kit.
Unlike the previous Testors C-130's I had been building, this one
actually got the interior built. What a chore! The interior pieces
mostly fit, and most of the major shapes are present, but they lack
detail. The original advertisements for this kit boasted it being so
complete that "even the broom used to sweep the cargo bay interior
was provided". Yeah, right... That broom is the only minor detail
present in the cargo bay, and it is attached to a frame member I
have never been able to locate in all the C-130 tours and photo
sessions that I have taken.
All the major shapes are there, but they lack real definition. The
large air conditioning ducts and some of the more prominent pipes
are molded into a couple of pieces that fit into the roof of the
cargo bay, but a lot of the overhead wiring and plumbing is not
present. The boxes that form the wheel wells are present with their
quilted fabric covering molded onto them. The floor has lots of
relief molded into it to represent the tie-down lugs and anti-skid
panels. None of the web seating running down either side of the
cargo bay is present. The insides of the fuselage halves have no
details molded into them (like quilting or wiring or anything). The
large frame members around the cargo bay doors are provided, but
they are too smooth and regular, lacking the look of the quilted
fabric that covers them in the real aircraft.

The cockpit is only marginally more complete. All the crew seats are
there, but they are much too "clunky" looking. The major instrument
panels are present, but only about half the actual instruments are
molded on them. As the C-130 is a four engine aircraft, there are a
lot of intruments that should come in groupings of four or eight,
especially on the center main console. About half of the instruments
are missing with most of the groupings coming in sixes. Which engine
was not present in the aircraft Testors used for their research?
The instrument layout of the overhead engineer's panel is just plain
wrong. Like the main instrument panel, the molded instruments and
gauges on the engineer's panel reflect a three-engine aircraft. The
only thing right about the panel is its location on the ceiling.
The navigator's position has all the instruments molded into the
inside of the fuselage right half. Most of the large scopes are
represented, but they lack bulk. As surface moldings on the inside
of the fuselage half, they are nothing more than the faces of the
instruments without the boxes that the instruments go with.
In defense of Testors I have to admit that most of this detailing is
not even visible in the completed model. The view through the
cockpit windscreen panels and through the lowered cargo door in the
back is rather limited. Painting just the details that are there so
things look busy is more than enough to make a presentable C-130,
even to someone the crews the real thing.

With the exception of the eyelets I mounted in the wings and
fuselage to allow for hanging the model, I build it completely
out-of-the-box. Someday I hope to do another C-130 with a truely
complete (read "mostly scratch built") interior. I have around 200
pictures of the interior to support that project, but the person
contracting for me to build this model was not interested in paying
for all that work.

Camouflage and Markings
The aircraft is painted mostly in Testors Model Master enamel
paints. At the request of the person contracting for me to build the
model, I painted it in the standard European I scheme (for the
C-130) with European Green (F.S.34092), Medium Green (F.S.34102),
and Gunship Gray (F.S.36118). While I prefered the European II
scheme, personally, only two of the unit's aircraft were painted in
that scheme with the rest in European I. The person contracting for
me to build the model wanted the model to represent one of the
European I aircraft that he most frequently seemed to get assigned
to.
It took some research and comparisons with pictures to determine the
interior color of the C-130 (and most of the Lockheed airlifters). I
have not found any official documentation and I have seen a few
variations, but the closest match looks like it is Blue (F.S.35414).
I have seen some more olive colored interiors, but most appear to be
close to this blue. This is interspersed with areas of Dark Gull
Gray (F.S.36231) depending on which area of the interior you are
looking at.

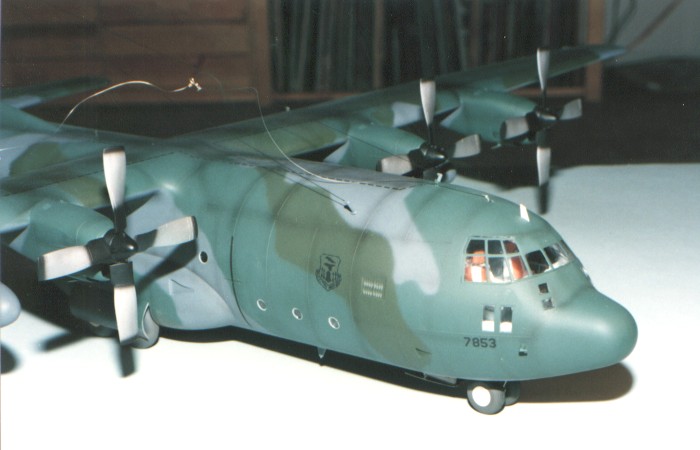
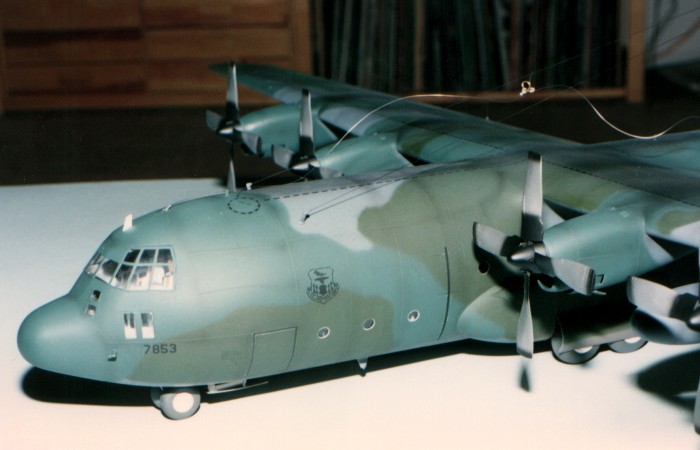
For markings, I used the kit decals and added the AFRES titles on
the vertical tail so the aircraft could be interpreted as a locally
based 913th Tactical Airlist Group aircraft. I also revised the
serial number on the tail to be the exact aircraft from the 913th
TAG specified by the person contracting for me to build the model.
To complete the markings, I hand painted a low-vis rendition of the
unit badge on the forward fuselage.
For weathering, I used my typical style of thinned down enamel paint
washes and air brush shading. I followed this with some silver
dry-brushing to pop out detailing. For a more complete discussion of
what I do to weather my models, see my posting on HyperScale,
"Weathering Aircraft".