Introduction
Having destroyed more enemy aircraft than any other fighter of World
War 1, the Sopwith Camel was one of the most successful designs of
the war. Entering service during the spring of 1917, it was a highly
maneuverable yet difficult aircraft to fly. With the engine, fuel
tanks, and guns up front it was very nose heavy, and that combined
with the action of the rotary Clerget engine gave it a fantastic
right-turn capability. Veteran pilots would use this to their
advantage, but a number of inexperienced pilots were killed in
accidents as well.
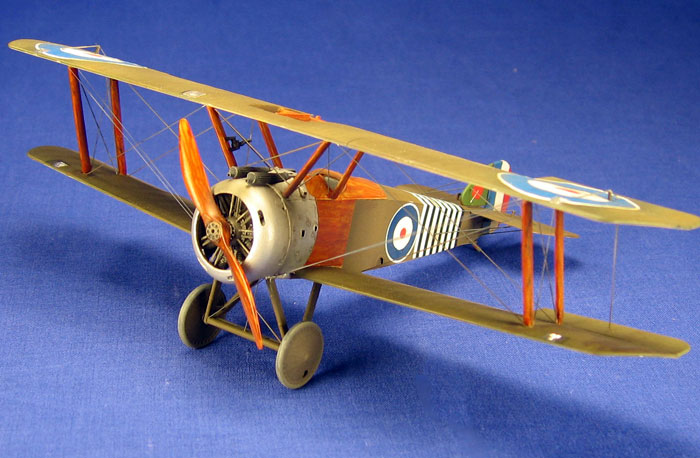
Eduardís new Camel kits have been out for a couple of years now, and
I decided to build one of them depicting Camel #B6313, the Camel
used by the famous Canadian ace William ďBillyĒ Barker for 46 of his
kills.

Construction
Construction of the cockpit, fuselage, and lower wings went
smoothly, but attaching the upper wing and struts was one of the
most frustrating exercises of my modeling life! The upper wing sits
forward of the lower wing, meaning its struts, all eight of them,
all sit at various angles.

While I love Eduardís kits, I thought the kit engineering here was
poor. All of the struts are molded with small nubs on the ends that
are supposed to fit into equally small recesses in the lower and
upper wings. The nubs arenít long enough to hold the weight of the
strut however, meaning thereís no way to glue a strut to the wing
without having to hold it with your hands while it dries. Since the
upper wing needs four of the struts in place to hold its weight, you
end up trying to glue four struts to the lower wing and then hold
them all upright while trying to position the upper wing on to them!
Unless you are an octopus, you quickly run out of hands. It didnít
matter what glue I used, I just never had enough hands to hold it
all together. I tried a homemade jig, but that didnít work either.
After a whole night of trying different methods and failing, I was
ready to pitch the whole kit in the trash! Finally I had success by
super-gluing the inboard struts onto the fuselage at what I thought
were the right angles, and then super-gluing the upper wing to them.
The four outboard struts were then attached after that, but as I
expected, the whole assembly wasnít as accurate as I would have
liked. The upper wing is too far forward and off to one side a bit,
but there was no way I was going to go back and try again! It was
truly a frustrating experience.
I think Eduard could easily fix the problem by turning the nubs on
the ends of the struts into proper pins that could hold the struts
up on their own. The modeler could then easily drill holes in the
wings, assemble the struts, glue them and the upper wing, and then
position the upper wing accurately as the whole assembly dried. Iíd
gladly putty over some small holes to avoid that experience again.
Once my upper wing rage subsided I finished up the construction,
adding the cowling and landing gear. I used EZ line for the rigging.
I left off the wheels, prop, and machine guns and the model was
thankfully ready to be painted.

Painting
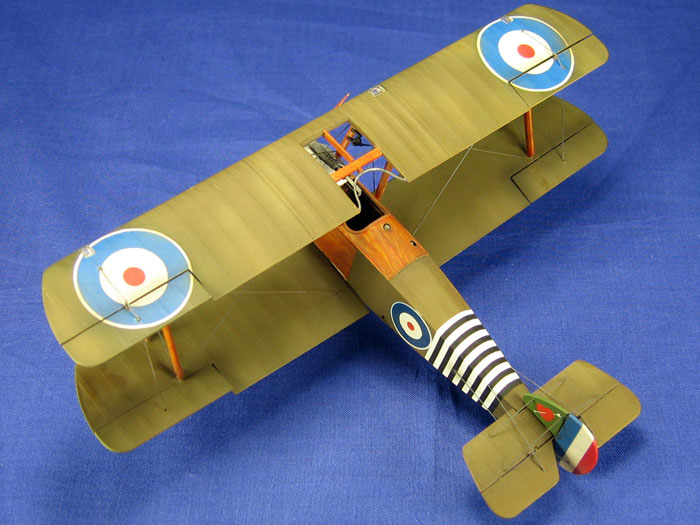
After a primer coat of Mr. Surfacer 1000 was sprayed on the whole
aircraft, I sprayed Testors Acrylic Radome Tan on the undersides of
the fuselage and both wings to simulate Clear Doped Linen. To
simulate the khaki green color on the upper surfaces I used Tamiya
Olive Drab. I then added some Tamiya Dark Yellow to the Olive Drab
to tone it down a bit, and randomly sprayed some spots and streaks
on to the upper surfaces.

I brush-painted all of the Camelís wood parts using a three-step
procedure that I read about online. First the parts were painted
Testors Acrylic Wood, a beige color. Then Testors Acrylic Leather
and a small brush were used to paint wavy lines to simulate the
grain of the wood. Lastly a generous coat of Tamiya Clear Orange was
used to unify the first two steps, resulting in realistic looking
wood with a varnished gloss finish. The cowling and sheet metal
panels around the nose were brush-painted with Testors Aluminum. The
machine gun was painted Tamiya NATO Black and then dry-brushed with
Testors Steel. The rigging wires were painted Tamiya NATO Black.
I sprayed the entire model with Future to get it ready for the
decals.

Markings & Weathering
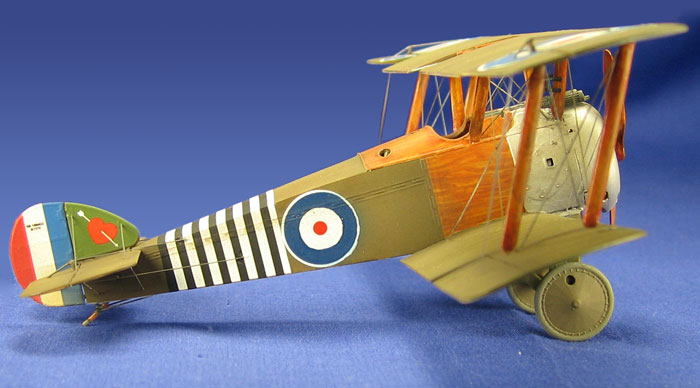
I used Eagle Strikeís ďSopwith F.1 Camels, Part 1Ē decals and they
went on flawlessly. I usually use Walthers Solvaset to get the
decals to sit down over any bumps or recesses, and the Eagle Strike
decals had no problems with it. I glued on the prop, wheels, and
machine gun and sprayed some Testors Enamel Flat Finish over the
whole aircraft to seal the decals and tone down the finish. Like
many modelers Iíve tried many flat finishes in search of the one
that creates the flattest finish and lately Iíve had very good
results with the Testor's Enamel Flat, sprayed right out of the
bottle with no thinning.

Using a small brush I used a thin wash of 50/50 Lamp Black/Raw Umber
to accentuate the recessed lines around the cowling and sheet metal
panels on the Camel's nose. I then airbrushed a very then mix of the
same mix around the flaps, wheels, where the wings and stabilizers
meet the fuselage, and especially around the engine and cowling to
add a bit more grime to the model.
My last step was to mist on a bit of Tamiya Desert Yellow around the
wheels and rear skid to simulate some dust and dirt.