Construction
This is the 1/32 Trumpeter F4F-4 builwith the addition of the
excellent Eduard photoetch cockpit set 32 109 and Super Scale decals
32-200.
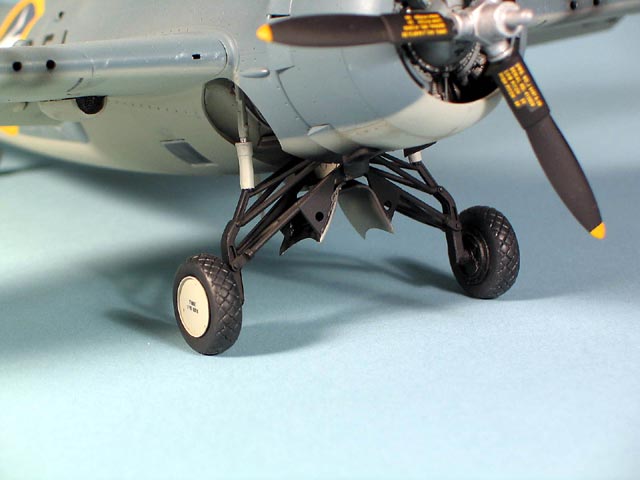
Also, the big news is the use of Jerry Rutman's resin tires and
wheel aftermarket parts instead of the dreaded kit rubber tires.
I
asked Jerry to make a set based on the kit parts with improvements
and as usual, he responded with his outstanding skill. The Main
Wheels and tires are one piece but will need kit part C33 to be
trimmed down and used as a spacer for proper fit to the landing
gear.

He didn't have the gear struts in hand when he made the parts. They
work beautifully and include a tailwheel tire which fits onto the
kit's tail wheel rim. It is a little jewel with carefully done ribs.
The main tires are diamond pattern. Well done Jerry! The parts
are available on his website.
The Eduard cockpit was also used for
this project. Note the very delicately done instrument faces. The
photoflood lights are causing the compass to appear white.
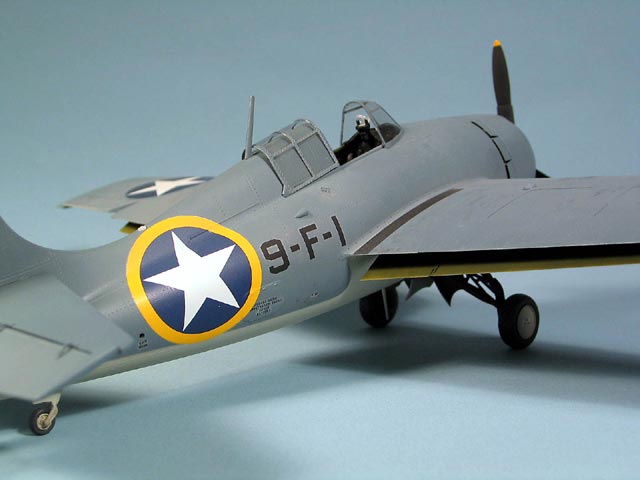
The aircraft depicted is from VF-9 flown by Lt. Cdr John Raby during
Operation Torch, the invasion of North Africa in Nov 1942. I have
always liked the yellow surrounded national insignia and the simple
yet attractive blue grey and light grey camouflage.
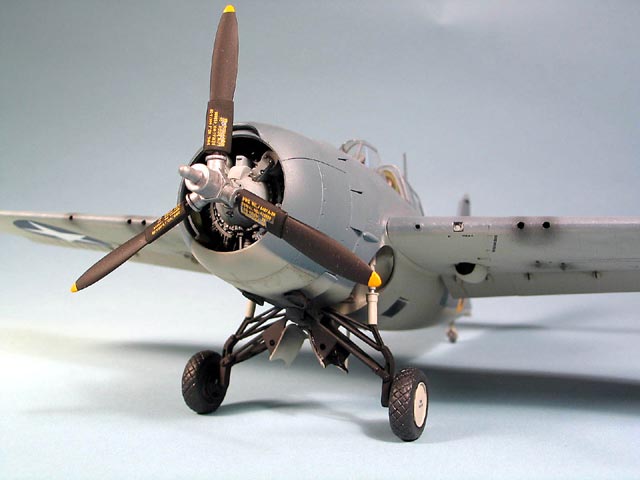
The kit's
engine is pretty good and has a hand mixed blue grey painted engine
case and aluminum painted cylinders highlighted with a dirty thinner
wash. Bolt heads were picked out with aluminum paint.

I even hand painted a tiny Pratt and Whitney eagle insignia on the
engine case below the prop shaft!
You have to be nuts to do that kind of detail painting.

Painting and Markings
I used model Master paints throughout with FS 36164 used on the
upper surfaces, with FS 36320 on the lower with a mix of both to
lighten the fabric control surfaces and do an overall spray for
weathering dulling of the paint.
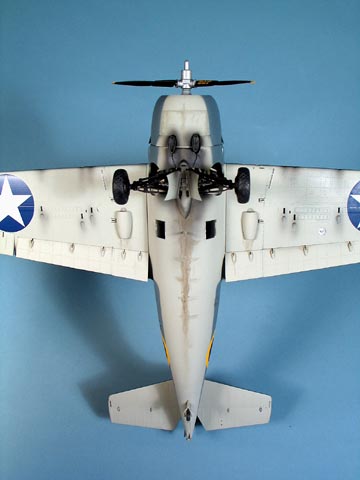
I have weathered the wing with
dry brushed shoe scuff marks and Flat Aluminum paint weathering. I
didn't go crazy with weathering since this was early in the war and
the airplanes were relatively well taken care of.
I added with oil
stains and exhaust stains to the underside.

I love doing these and the great effect that always comes from this
type of weathering particularly with radial engines.
The exhaust stain was mixed from Model Master Flat Black and Very
Dark Grey. The oil stains were a wash made from Burnt Umber and a
bit of Flat Black. I use regular airbrush thinner for washes but it
would be safer to used oil paints. You must use thinner based washes
carefully not to damage underlying paint.

Conclusion
Overall I was pleased with the kit's fit. It was a three month
quick build (by my standards), and it displays nicely. I recommend
it.

Now if Trumpeter would only make a 1/32 P-39 Airacobra !