Description
The thing I like about car modelling is the radical chopping that
can be done.
When I happened across this nice little Tamiya kit of the Fiat
Abarth 695, I got to thinking.
Never one to assemble a car kit as per the instructions I've
introduced some changes in favour of improved rally performance...

Construction
First, a sporty looking car needs a long bonnet. So, with razor
saw in one hand and putty tube in the other, the surgery started. I
cut off the windscreen section forward of the scuttle and halfway
back through the roll-top roof. After much trial and error I decided
on the distance to move the windscreen to the rear (about 18 mm) and
then proceeded to glue it in place. Having filled the resulting gap
with some chunks of plastic, I set about 'bogging' the joint. I used
Tamiya putty, but next time I'd use CA glue and bicarbonate of soda
as this sets virtually instantly and fills gaps nicely.

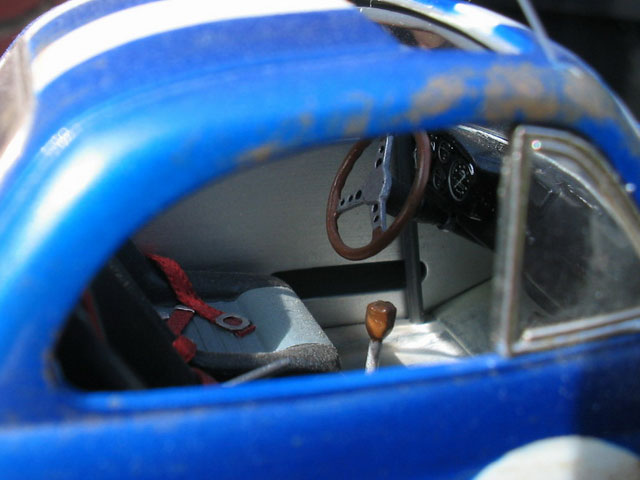
A roll cage of copper wire was soldered together, carefully measured
to clear the seats which have been moved back to where the rear
seats would normally be. The drivers would have to be very small of
stature or their heads would receive a hammering on the rear window!
The interior lining is thin sheet styrene painted an aluminium
colour. The seat belts are made of the narrowest ribbon available at
the local fabric and craft store. I chose a bright orange for a
splash of interior colour. With some narrow strips of coffee tin
foil wrapped around as various buckles, they look quite convincing.
The dashboard is finished as per instructions with the kit
speedometer decals adding a nice touch.

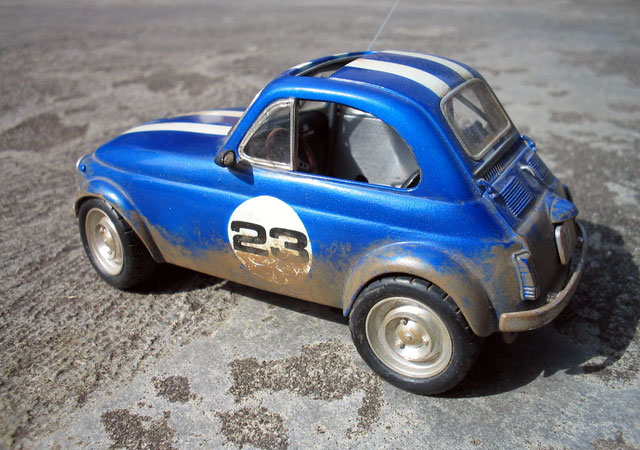
My brother, Anthony, donated the wheels and tyres from a 1/25th
scale Citroen 2CV. Because they are of a larger diameter I lifted
the suspension with blocks of plastic, although the tyres are still
virtually touching the wheel arches. This car is perhaps set up for
a hard top rally stage. I also steered the wheels as this gives a
car so much more animation.
Disk brake rotors were made from the metal parts of some clothing
buttons which are already finished in a nice bronze colour. A bash
cage made from copper wire protects the rear mounted engine. A
chrome piece of an old ball point pen was then added to the end of
the muffler as a nice big exhaust pipe. It would scale out at around
100mm in real life - probably overkill for such a small 2 cylinder
air cooled engine!

Painting and Weathering
After priming the car for painting I first painted the roof,
bonnet and sides white before masking the stripes and side number
disks with strips of Post-It notes.
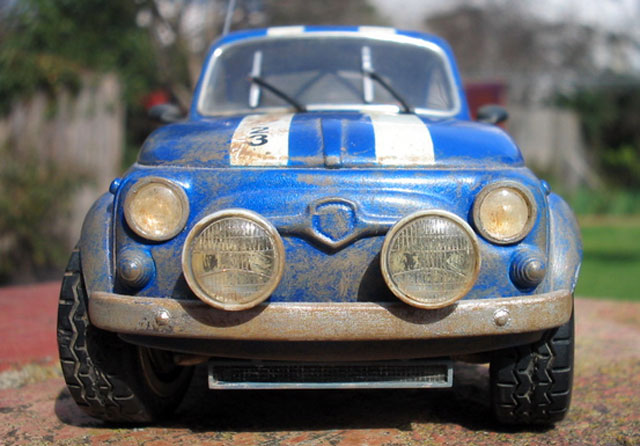
The blue colour is Model Master Acryl 'True Blue Pearl"
airbrushed straight from the bag. I then fixed the driving lights
which come from a Ford Hot Rod. Letraset rub down number were
applied after finding the right font.

I used Bare Metal foil for the first time, on the window trims,
which look very pleasing. A good spattering of mud was dry brushed
on after fixing on the bumpers. Finally a stretched sprue aerial was
added.
Voila! A Subaru munching beast to scare the pants off the WRC
brigade!
V...V...VAROOOOOOOOOOOOOOM!