Background
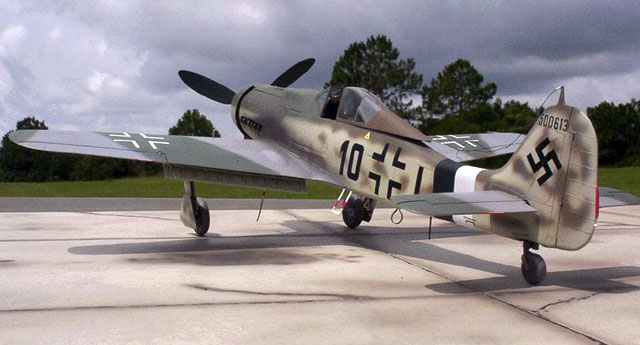
This was a controversial Dora of JG 26, reported and photographed as
captured intact with the possibility of having two styles of zeros
in the side number "Black 10". One squared off at the top and bottom
and the other side a complete oval.
A photo in the Squadron Fw 190D Walk Around book shows the D-9 after
repainting by U.S. personnel with the st'bd side sporting the oval
"0". After conversing with another Luft Hyper Scaler the probability
arose that this may be a composite of two airframes, both being a
"Black 10", and both being of JG 26. The one found in Celle intact
most likely had the all yellow tail as in Jerry Crandells
interpretation with the oval zero, werk no, 500613 and another
airframe was discovered partially destroyed with the squared off
zeros and a werk no. of 500615 or 13.

I was told a photo of the partially destroyed D-9 is in a Broken
Eagles edition. I have not seen this edition but the idea intrigued
me and the possibility of a number airframes in this block of Wk.
No.s may have been painted using the so called 84 green or the Buff
color. With this in mind I just figured I'd do this interpretation
as a - hey, it coulda' been!

Construction
Hasegawa's 1/32 scale offering of the Fw190D-9 newtooled is without
a doubt one of the finest kits out today so I'll forego the details
as there have been enough reviews of the kit already. The stock kit
would build into an impressive display right out of the box but I
kept hearing this little voice saying -detail, detail. I decided to
impart as much scratch detail as I could without doing major surgery
on the kit parts. I got out a piece of paper and with the kit in
hand I proceeded to jot down what I could accomplish with just what
I had on hand in my workshop starting with the engine plug and
cockpit.
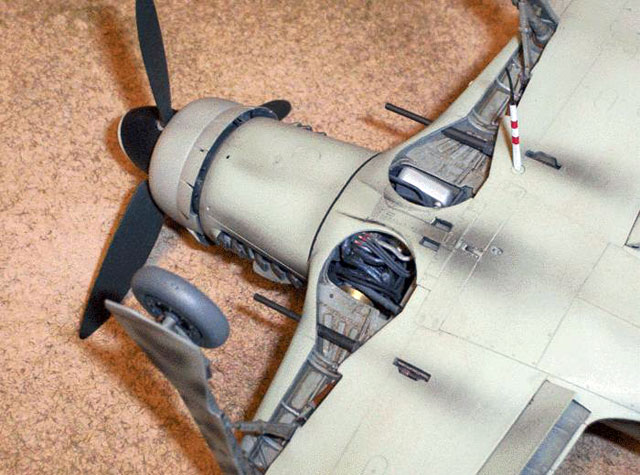
With the engine plug assembled along with the firewall and Ammo cans
I proceeded to add tubing and piping connected in different areas to
fittings and blocks carved from resin pour stubs. I used these
pieces also on the insides of the fuselage to connect tubes and
hoses to. Using Gizmology here I managed to get the insides of the
engine compartment to resemble the pics in the Walk Around. I sanded
the inside edge of the wheel well liner to a scale thickness where
it stops at the engine hole, added fine solder brake lines so they
wrapped back under this edge and other small details. After the
fuselage was closed ( with finished cockpit in place) I rolled a
small piece of super thin sheet brass and used it to connect the
airscoop opening to the supercharger intake on the engine. I also
used the brass to form a saddle for the throttle linkage between the
firewall and engine. It's right behind the oil tank in the open
well.

The cockpit size offers lots of area to add detail in this scale so
I went at it. Taking my scribing tool and a straight edge I gouged a
trough under the sills inside of the fuselage halves where the
canopy rails would be. Using sheet brass I cut and formed little
angles that when glued into the scribed troughs would represent the
canopy rails and other brass parts were fashion to complement the
sill area forward of the rails including the canopy release handle.
Different gauges of solder was used for hydraulic brake lines and
the Throttle lever was modified to fit to the console in lieu of
mounting to the fuselage side. Instrument faces are from the kit
decals, punched out and applied.
The belts and harness are from the kits photo-etch fret. The only
other part used from the fret was for the DF loop. A new mapcase was
fabricated from brass and the strap for it from lead foil. Brass
again was used for the plates either side of the seat and an oxygen
regulator fashioned from sprue was added to the st'bd one. The
oxygen hose is solder wrapped with fine wire and painted. It comes
from behind and under the seat and lays up on the seat. Other
smaller details were fashioned from sprue and wire.
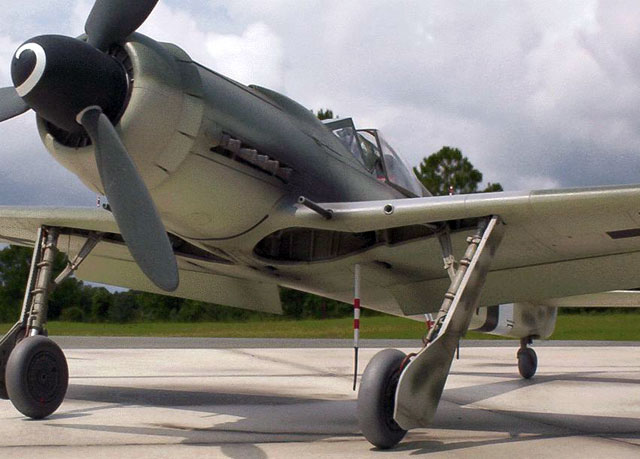
The tailwheel wanted me to build it with a seperate strut and wheel
but I refused to listen to it.
Instead I detailed it with a locking mechanism and modified it to
sit up in the fuselage just a bit further. I added brake lines on
the main gear struts using brass wire for the line going down the
strut and flexible lines are solder connected with short pieces of
wire insulation. After the gear was installed I attached a small
length of stretched sprue to replicate the tailwheel retractor
cable.
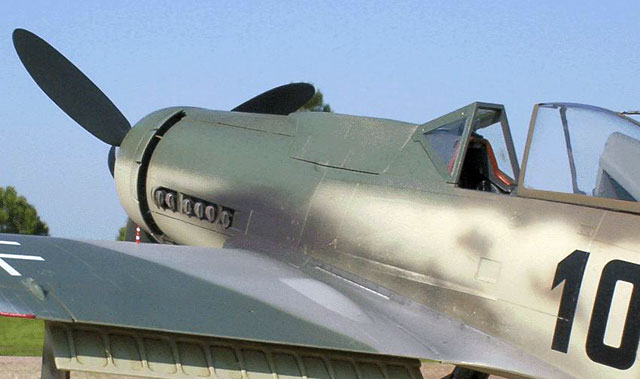
New cannon shrouds were fabricated from alum tube and cannon barrels
were made from solid alum welding rod with the ends drilled out. A
new gun camera housing was fashioned from alum tubing also, counter
bored to give the oponing a more scale appearence.
The seperate gun cover and top part of the forward fuselage made it
possible to come up with a process for applying the cowl flap
actuator rods and radiator mounts to the model after painting.
I located the areas where the rods and tubing mounts for the
radiator would exit the fuselage and drilled the appropriate holes.
Little lengths of brass wire were CA glue to the backside of the
radiator and this could then be fitted and removed whenever needed
for painting, etc. I now added the flap connectors from brass after
thinning the inside edges a bit more and drilled little locating
holes for actuator rods for final assembly. The little lengths of
wire could now be installed through the opening using tweezers
before the top cover was glued on. The exhaust exits were carved out
using a #11 blade with about 1/16" of it snapped off. They were then
sprayed burnt iron, buffed, dry brushed with rust the dry brushed
with white to accent the openings. My exhaust stains are a thinned
mixture of raw umber and black.

I wanted the canopy to sit in the "squeezed" position that was
caused when open because of the taper of the fuselage. The blown
plexi was flexible enough for this bow in and the attachment points
from the headrest to the canopy frame was also flexible. I
fabricated brass canopy mounts that would fit into the kits rail
recess either side of the rear deck. My brass rails match up to the
kit recesses. I added the canopy travel rod that lays in the st'bd
rail and connects to the canopy crank wheel of which is stretched
sprue. The antenna wire mount on the blown hood is a 1/25 scale alum
model car ignition wire detail part which has two small holes in it.
It's bent in the center at about a 45 degree angle and CA glued to
the hood. The fuselage was drilled as was the tip of the antenna
mount on the tail and 1'25 scale car ignition wire was used for the
antenna wire. The wire to the fuselage was slipped on the main wire
and left mobile. Insulators were fashioned from wire tightly wound
around a small drill bit and slpped onto the main wire. The spring
tensioner on the tail was made in the same fashion and slipped onto
the end of the wire along with another one at the other end for the
hood mount. Passing one end of the main wire through it's respective
hole, the wound wire was ushed up trapping the wire end fastening
the antenna at both ends securely. The loose lead in wire was
slipped into the fuselage and secure with CA at both the main wire
and fuselage.
The texture of the model car wire allows it to be shaped in a
relaxed manner similar to the real thing.

Painting and Markings
I painted the undersides and fuselage sides with my
last stock of AeroMaster 84 enamel lightened up to a shade that
could also be determined as buff. Sort of an in-between. I used a
combination of AeroMaster and ModelMaster for the 75/83 upper colors
so the colors wouldn't be so monotone.
I left weathering to just some very light post shading and the
exhaust staining with the raw umber/black mixture. it was just too
purty to dirty. Coated with Floquil Clear Gloss and decaled with
AeroMaster's new set for three Dora 9s. Decals went on great with
the 10 + I as one decal so alignment is fool proof. The clear
disappears altogether. I used a litle Sol-v-Set to get things to
snuuggle down. Hasegawa forgot to add the little first aid hatch to
their offering but I stuck the little cross in the appropriate area.
I used the kit decals for the trim tabs and they worked great.

Sealed it all with Testor's Dull Cote.
The only other area that needed a little extra attention were the
prop blades. A little filing and sanding was required to give them a
more proper VS111 appearance. Painted then with my trusty AeroMaster
RLM 70. Don't forget to reposition your flaps as they are not
supposed to hang straight down as the kit would have you mount them.
Now bring on that 1/32 Fw190A-8!