Introduction
This model is the 1/48 scale Hasegawa Henschel Hs 129 ground
attack aircraft. It operated for the main on the Eastern front in
relatively small numbers right throughout the campaign and was
mainly successful on tank busting duties, what today would be called
battlefield interdiction. The aircraft was heavily armoured to
enable it to operate over the front line where Soviet AAA could be
murderous. The main draw back was the lack of power from the French
built engines which were captured after the fall of France, this
coupled with the armour plate led to a slow top speed and resulting
in a vulnerability to interception by fighters.

Construction
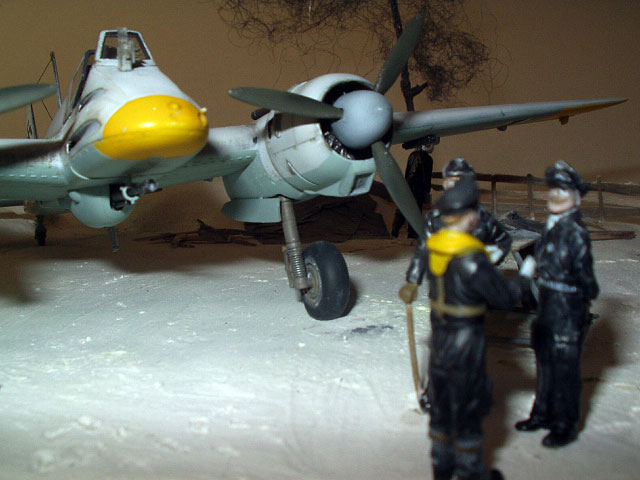
For my model, I wanted to depict an aircraft operating in the
temporary white distemper camouflage on the Eastern front so I chose
an aircraft of Panzerjägerstaffel JG 51 during the winter of
1942/43. My all time favourite aspect of model making is painting
and weathering models to hopefully create a bit of realism to a
model and this finish provides plenty of scope. To add that extra
bit of detail I utilised the Eduard etched detail set and to make
life a little bit easier their vinyl canopy mask.

I broke all aircraft model-making traditions and started work on the
wheels. I hate painting wheels, I really hate painting wheels so I
tend to finish them off first to get that out of the way, (how
airliner and AFV modellers cope I do not know)! Once this mind
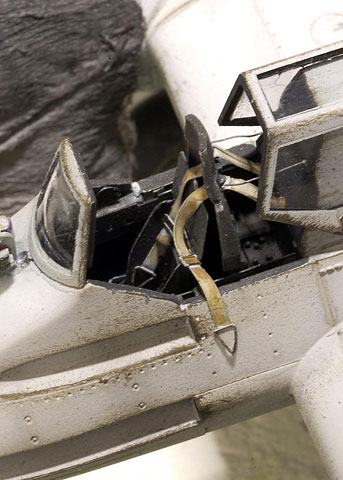
numbing chore was completed I started on the office. First off I
sprayed Tamiya black onto all parts whilst still on the etched fret/sprue.
When that was dry a coat of Polly Scale RLM 66 was misted on, after
which followed lightened RLM 66 was misted onto the high spots and
centre panels. The final stage was to dry brush light grey onto all
the raised detail to make it stand out. The next stage was to
assemble the cockpit minus the stick and, seat and armour plate, I
tend to leave these bits out of cockpits until the very end as an
aid to masking however in this instance, because of the tight canopy
fit I needn’t have bothered. In the cockpit of the Hs-129 there is a
plethora of levers and handles which are represented on the etched
fret and are in consequence flat. The stems I could have replaced
with thin wire however as the cockpit is very cramped and the
opening quite small I decide not to bother, I did however place a
blob ok Krystal Kleer on the ends to give some 3D effect. I did not
have any colour references for the cockpit s I used artistic licence
and guessed at which ones were red, yellow, black etc. I find colour
in cockpits really bring them to life.
 When
the cockpit was complete it was sandwiched in between the fuselage
halves which just clicked together, in fact this was the best
fitting kit I’ve yet made with the only filler being between the
spinner and the back plate.. The joints were sanded flush and the
panel lines restored. Then disaster struck, the instrument panel
fell out! I had to glue a length of sprue inside the nose for the
panel to sit on, thank goodness I hadn’t glued the nose cone on as I
had a fiddly enough job as it was. The instrument panel was
strengthened with araldite to prevent a re-occurrence.
The rest of construction went smoothly apart from fitting the
engines into the nacelles. It is important to get things lined up
because otherwise the nacelles won’t be parallel leading to a
‘wonky’ looking aircraft. The engine/nacelle assembly was tacked
onto the wing with Blue Tac which makes masking a lot easier. Top
tip; the fairing for the under fuselage cannon is best left off
until after painting, I tried to fit the gun after painting when the
fairing was fitted and had a nightmare getting the cannon level. I
fitted the pre painted undercarriage legs and masked them and the
wheel wells prior to painting so I could use them as handles during
the painting stage.

Painting and Markings
Onto the painting, hurrah. The model was primed with Halfords
white primer which acted as base for the Polly Scale RLM 04 yellow
theatre markings. When that was dry I added a touch of dark earth
and post shaded along the panel lines. When all that was complete
the yellow was masked for the RLM 65 which also was post shaded.
When complete the underside was masked ready for the top colours.
To begin with RLM 66 was sprayed onto the pre masked canopy. Next
came the RLM 70/71 which was sprayed freehand apart from where the
open crosses of the national markings would be, here Tamiya masking
tape was used to create a hard demarcation. The next stage was to
paint the national markings using the excellent Eduard BF 109
national markings mask. I love these products as the markings can
get the pre/post shading treatment, also there is no chance of
silvering or decal film being visible. When dry these areas were
masked up.

Next came the fun bit, white was mixed with a drop of grey (to take
the starkness of the pure white away) and I started to spray,
concentrating on the centre panels and slowly building up the
effect. Unfortunately I overdid it somewhat so I added RLM 71 to the
off white and post shaded along the panel lines, this resulted in a
most pleasing effect. The final weathering was dry brushing any bits
and pieces which were raised. At last I could remove all the masking
and applied the exaust staining using a mix of blacks, browns and
greys.
The final jobs were adding all the fiddly bits. The radio antenna
was added from stretched sprue and painted dark metallic grey, also
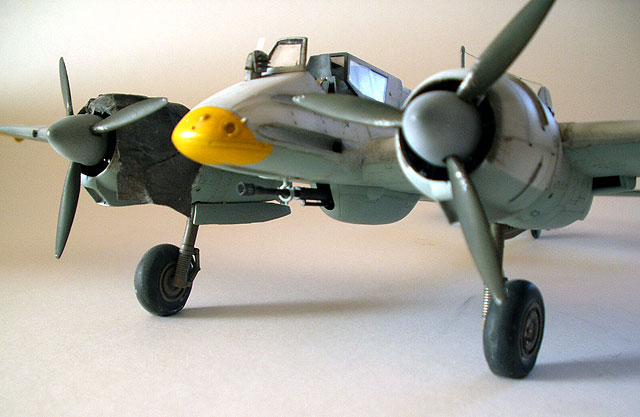
the engine nacelles were super glued on. Oh no, second Mayday, not
only did I manage to lose one set of external engine instruments
when I dropped one set onto the part eating carpet but I also lost
one set of engine exhausts when it pinged out of the tweezers during
painting. This is the reason for the tarpaulin on the right wing.
This was made from toilet paper dampened with a thin wash of dark
grey. When dry it was dry brushed with light grey and brown. It was
placed on the model and set using a wash of white glue.

Conclusion
Finally my tank buster was finished and I was very pleased with
how it had gone. I think I spent more time painting and weathering
this model than actually building it but for me that’s the best bit.
P.S, I have a theory that Saturn’s rings are made from small bits of
models teleported by part munching carpets and odd socks that go
missing in washing machines.


Click the thumbnails below to view larger images: