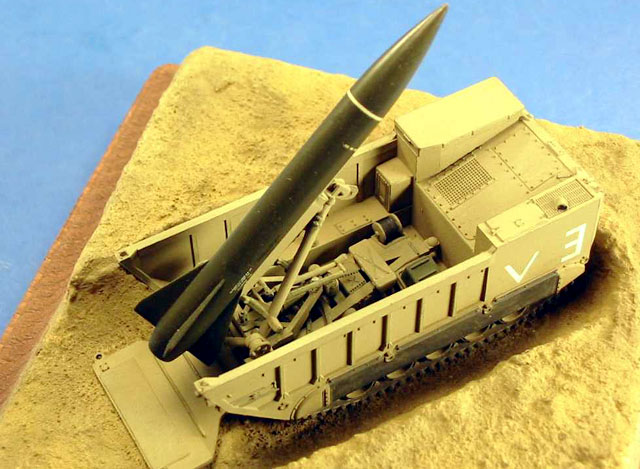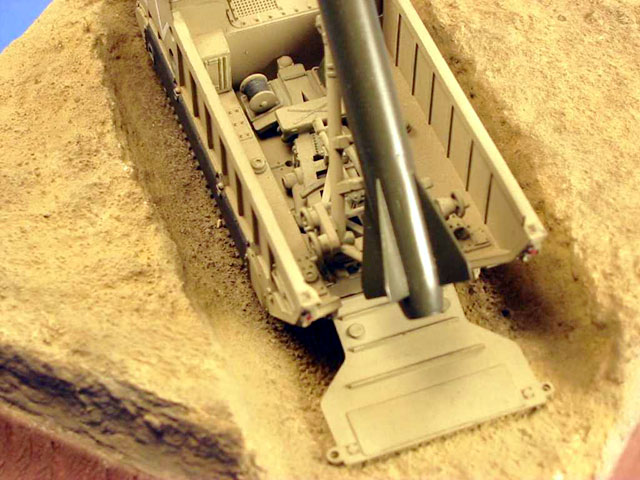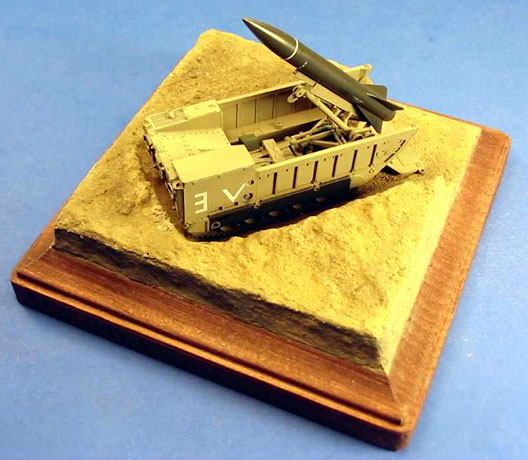
Construction and Modifications
Kit Used: Roco Minitanks
Scale: 1/87
This is a typical Roco kit that comes pre-assembled with
additional parts. The instructions are decent, but no decals or
painting guide is included. After disassembly I made the following
modifications.

The Missile Frame/Launcher was pretty well detailed, but
oversimplified. I made the missile guide rail from Plastruct H
channel and Evergreen plastic strip. (Without this modification, the
missile alignment pins are visible, and the missile does not sit
very securely on its mount). The missile frame locking hook was also
made from Evergreen strip that was punched with a punch & die, then
sanded to shape. The locking hook was then detailed with hinge pins
added from 2 Grandt Line Nut/Bolt/Washer castings. The missile frame
locking collar was missing the locking pins, so I also added these
from 2 Grandt Line Nut/Bolt/Washer castings. Hydraulic pipes and
electrical wiring was added to the bottom of the missile erector
from plastic rod and stretched sprue. The elevation wheels and
mounts were detailed with a Waldron Sub Miniature Punch & Die Set.

The Missile was assembled from the 3 kit pieces and the seams filled
and sanded. Once that was done, I thinned the wings for a more scale
appearance. I painted the missile Model Master Field Drab and added
all the stenciling and warning placards from a combination of decal
stripes and 1/72nd aircraft decals. The missile was added as the
last sub-assembly to the model once it was finished.
The Cargo Area/Missile Bay required a little bit of work that
Roco missed. I added rib detail to the inside of the missile bay
sides from Evergreen strip. The missile bay control box was made
from Evergreen sheet and glued behind the Driver’s Compartment.
The Outer Hull had some very easy things done to improve the
appearance of the model. I lowered the rear ramp into the blast
position. The headlight glass was simulated with clear gloss painted
over Testor’s silver. The rear taillights are done with Tamiya Clear
Red.

Painting and Markings
The paint finish is airbrushed with Model Master Israeli Sand,
then dry brushed with Model Master Dark Green. The tracks and rubber
portions of the sand shields are painted flat black. I added
Maneuver Markings made from individual pieces of white decal stripes
per my references. A very light dusting of pastel chalk wrapped up
the weathering.

The model sits in a Vehicle Revetment made from ˝ inch Styrofoam,
covered with Sculptamold mixed with sand and gravel. After drying I
painted the surface with my airbrush, then dry brushed with various
sand and gray colors.

References
This was a really fun kit and I recommend it to anyone.
This model won a bronze medal at AMPS 2000.

Lance Tactics and Organization
by Mike Gawell
Captain US Army (inactive)
1st BN, 12th FA (Lance) C Battery. 1986-1988
The Lance, at least as the US Army and the
Germans used it, was envisioned as a shoot and scoot weapon, so we
never dug in. The platoon was based upon the same "TO&E" as an
infantry platoon, and our chief weapon was stealth, and hiding.
It was anticipated that a fire mission would have
pre-surveyed firing points. The Platoon leader would locate these
pre-surveyed points, and based upon his recommendation to the Fire
Direction Center, would have missions run in a certain order upon
the 5 or 6 points in a given area. (There’s nothing like locating a
1/4 inch stake in a field the size of a grid square at o dark
thirty...)
The last year I was there we were using the
satellite for getting an 8-10 digit # for the stake as a firing
coordinate, so we had to ensure that when the launcher pulled over
the stake we were within one inch of center on the towing eye. The
fire mission would usually be under 10 minutes from pulling over the
hub until launch, and the standard was 12. (Our best was 6 minutes
to pull over, lay the missile on target, and prepare to fire.)
Before this, we would have the platoon officer, and the driver set
up the survey equipment, and take an initial tangent to target.
After that, it was expected that we were to break all the equipment
down, and un-ass the area in less than 3 minutes before all hell
would be raining down upon us.
Lance units usually operated 3-5 clicks behind
the lines, but the airmobile concept was designed to take us behind
the lines to hit targets deep in the enemy's rear. (These of course
would be a nuke, and our ticket was expected to be one way.) The LZL
fit inside a Chinook along with the crew.
A Lance Battalion had 5 Batteries. 1 HQ, and 1 Service Battery that
held the re-supply of missiles, and 3 firing batteries. Same concept
as an Infantry Company/Battalion. Each battery had 2 launchers, and
2 Assembly and transport vehicles (same frame, but with the crane.)
The A&T platoon had 5 extended wheel base 5 ton vehicles, and would
store up to 22 missile bodies, and warheads.
The anticipated time to unseal, inspect, and mate
a missile body to warhead was 15-20 minutes, but with motivated
platoons, it could be done in about 10. The A&T vehicles could ride
2 each mated missiles on them.
We would find a place away from the battery main,
and drop one onto the launcher. (Approximately 10 minutes, and done
MUCH quicker in order to get out of the area by both platoons.)
These were random areas away from any other battalion activity since
a crane operating in the middle of a battle area is rather obvious.
The firing platoons with one launcher, one jeep/HUMVEE,
and one M880 or like vehicle, (approximately 10 soldiers) would
never even see the battery main area under battlefield operations,
and operated independently from the battery, and each other.
By the time I left, I also was experimenting with
having my A&T sections (2 each, or 10 soldiers apiece) operating
away from the battery main in order to "hide" my depot area.
Supposedly, each firing platoon and the A&T platoons would have had
a platoon or so of infantry attached for fire support in actual ops,
but we expected fully not to have them.
Soviet Spetznatz was our greatest anticipated
foe, and why we would "hide". Our hiding was passive, and our
greatest asset. We also would have a hide location immediately
adjacent to the firing areas we would move up to. This would limit
our exposure to accidental over flight to only 6-10 minutes while
over the hub, plus any travel time from the hide area to the firing
hide area, usually no more than 3 km, and the firing hide area was
within 100 m of a firing hub location.