Messerschmitt Me 262A-1a
by Bob Laskodi


Introduction
There are a ton of articles dealing with the
history of the Meserschmitt Me 262 and how to build the fantastic
Tamiya kit on HyperScale so I won’t waste the reader’s time with a
boring re-hash of those. What I will present is how to build the
Tamiya Messerschmitt Me 262 using some of the really nice products
available from Cutting Edge that turn this incredible kit into a
showstopper.
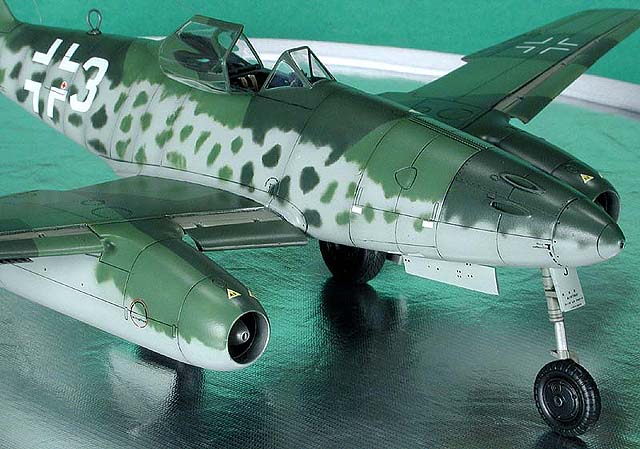
Most serious modelers know that when the
Messerschmitt Me 262 is sitting on the ground, the slats are
extended since they automatically deploy below a certain airspeed.
While the Tamiya kit is superb, it doesn’t feature the extended slat
option so a modeler is going to have to do some serious work to
capture this distinctive feature. In addition, since I am a resin-o-holic
I just can’t resist aftermarket detail sets, and I used the Cutting
Edge Messerschmitt Me 262A Super Detailed Cockpit, and Wheels, along
with the Dropped Slats and Flaps set.

The Kit
The kit (Tamiya 1/48 Messerschmitt Me 262A-1a)
is typical Tamiya; a high quality injected molded plastic with
detailed engraving that needs no further introduction.

You can search HyperScale for further
information on this kit along with the Cutting Edge products used.

Construction
There is absolutely nothing to report here with
the kit, as the Tamiya kit builds with only a few minor problems and
the Cutting Edge cockpit presents no real challenges outside the
usual resin issues (removing pour stubs, cleaning up parts, etc.).
In addition, the Cutting Edge wheels are a nice replacement for the
kit wheels, however the much hyped “correct” hexagonal tread is only
a slight improvement over the simplified tread in the kit provided
wheels. I doubt that I’ll spend the relatively expensive amount of
money again to correct that minor defect. Both of these products can
be easily used by the beginning modeler without any serious
problems. However, the dropped slats and flaps set is a completely
different issue, that is best left to more experienced modelers.
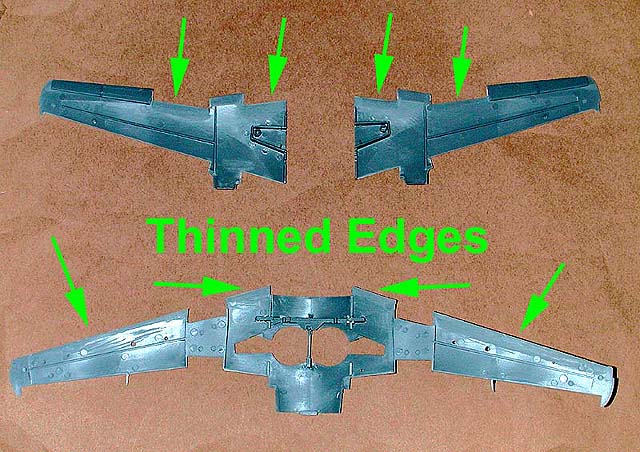
Serious surgery is required to adapt the slats
and flaps set to the kit. I started by cutting off the upper wing
slats and flaps by repeatedly scoring along the panel line with a
#11 Exacto blade until it cut through the plastic. The lower wing
flaps were also removed in the same manner. After dressing up the
cut edges with sanding sticks, I proceeded to thin the front part of
the lower wing where the slat inserts would fit using the same
Exacto blade to carefully “shave” away excess plastic to form a
“knife” edge. The same process was used with the upper wing, having
to thin the trailing edge of the top wing to fit the flap inserts.
Now this doesn’t sound all that complicated (and really isn’t)
except for one little problem.

The major complicating factor is that Tamiya
has molded in chord wise stiffeners to support the wing and ease
assembly. Now you must carefully trim these away in very specific
locations in order for the various inserts to fit. So dry fit, trim,
dry fit, trim, dry fit, trim, ad naseum! To make matters worse, if
you are planning to use the very nicely done ailerons provided in
the Cutting Edge set, you must cut these off which results in two
wing halves with very little mating areas to each other! I skipped
on the ailerons since there would be very little plastic left to get
both wing halves together without any serious alignment issues. I’m
sure it can be done correctly, but not by me!
After numerous dry fitting episodes, I taped
the wings together along with the various inserts held in place with
small pieces of masking tape to check final fit. Of course, there
were many fit issues that needed resolving involving the various
wing stiffeners. After numerous trial-and-error dry fit attempts, I
finally had every thing pretty well placed and trimmed. Not doing
the ailerons really saved my rear because I had at least one spot on
the wing with positive alignment points so I could commit the few
wing stiffeners left to Tamiya Liquid Cement to bond the two halves
together. I let this dry overnight before adding the various inserts
as I wanted a nicely bonded wing that wasn’t going to fall apart!
Now it was time to commit the slat and flap
inserts in place and a last minute dry fit showed that I had missed
a few minor obstructions! Out came my diamond coated needle files
(these were invaluable for this task!) to correct the last
obstructed fitting parts. I was finally at the point of committing
the slat and flat inserts permanently in place with superglue. Of
course there were a few gaps that needed filling between the inserts
and the wing. I used white glue to fill these gaps, smoothed out
with a moistened cotton bud so I would not have to do any sanding. I
left the actual slats and flaps off until final assembly so I
wouldn’t break them off and this proved to be a wise decision since
they did fit without any problems. Yeeee haaaaaw, I am finally ready
to join the wing to the fuselage. With care I was able to get every
thing lined up and glued in place with Tamiya Liquid Cement (but it
wasn’t easy since significant portions of the wing were removed).

I also used the Cutting Edge elevators
provided, but after the ordeal with the flaps and slats this was
very easy since the horizontal stabilizers are one piece. It was a
simple cut off the kit elevators and replace with the Cutting Edge
parts. I did use 5-minute epoxy on the elevators for strength.
After a quick sanding down of all the joins (no
putty needed) the model visited the paint shop where it was painted,
decaled, and weathered before final assembly took place.

Paint and Decals
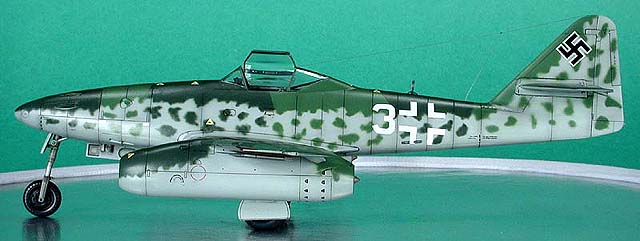
The model was painted entirely with Testor
Model Master (enamel) in Lichtblau RLM76 (#2086), Lichtgrun RLM83
(#2092), and Dunkelgrun RLM82 (#2091). The inside of the slats/flaps
were painted Grau RLM02 (#2071). I used paper masks to do the
topside camouflage pattern.
I enlarged on my scanner the painting pattern
provided on the instruction sheet to the correct size and then used
Tombo Mono Multi Liquid Glue to coat the backside of the cutout
masks. This is really a great product for paper masks. The adhesive
(when dry) will not pull up paint but is fairly tacky so you can use
paper masks around curves. I then carefully lifted the edges with a
toothpick to provide a slight amount of overspray. The fuselage side
mottle was done using highly thinned paint (30%) airbrushed freehand
with my Iwata airbrush.
A light top coat of Future to prepare the flat
surface for decaling followed this.

I replaced the kit provided decals with Super
Scale International 48-781 since it had a decal scheme for Galland’s
White 3 while with JV44. I make no claims to accuracy of these
decals, so please don’t send e-mails about how they are “wrong”
(like on my recent Spitfire article) as I was building this model on
commission as directed (just like the Spitfire!). The SSI decals are
very nice, well printed on a thin carrier. I applied MicroSol
setting solution and the decals responded very well to the setting
solution with no permanent wrinkling.
After drying overnight, I wiped the decals off
with Polly S Plastic Prep to remove any residue and after drying I
shot a very light coat of Future thinned with Polly S Airbrush
Thinner (50:50 mix) over the decals to seal them. For weathering, I
chose to accentuate the engraved panel lines and surface detail with
a sepia water color wash.
To simulate the darker putty areas around the
panel lines, I airbrushed a fine line of Dr. Ph Martin’s Hydrus Fine
Art Watercolor (21H-Sepia) highly thinned with Polly S Airbrush
Thinner (90%). Hydrus is a fantastic weathering product similar to
Tamiya Smoke in being translucent and airbrushing nicely, but comes
in a huge range of colors (unlike Tamiya Smoke!).

Finishing Touches
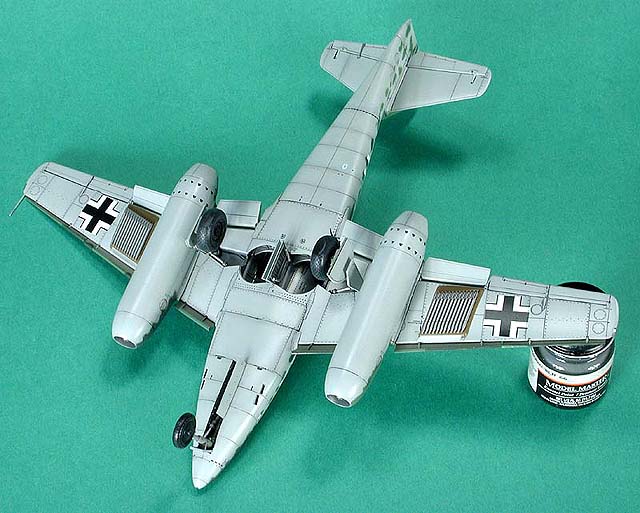
The last step was to install all the landing
gear, slats, flaps, R4M rockets, and any thing else left on the
model. After a final clear coat of Testor's Dullcote, I removed all
of the masking from the clear parts and the project was over!

Conclusion
This is an excellent model of an important WW
II aircraft. It would be an extremely easy build suitable for first
time modelers if not for the challenges inherent with the dropped
slats/flaps. A little careful work with that portion of the kit and
you will be rewarded with an excellent model.

More Pictures
Click the thumbnails to view larger pictures: