Introduction
Model Master’s Non-Buffing Aluminum is a favorite paint of mine.
Having extremely fine grain, it gives a good representation of
silver-colored aircraft dope, or weathered, flattened aluminum.
It does have one drawback - it is somewhat fragile. It won’t take a
lot of handling without rubbing off when applied over bare plastic.
It does a little better when shot over a flat enamel primer, but it
still doesn’t like to be masked, even if clearcoated with Model
Master Metalizer Sealer. I messed up a beautiful ESCI F-5A model
learning this lesson, and will not make that mistake again. Plan
your painting sequence accordingly; the Aluminum should go on last.

Airfix 1/72 Scale P-51D Mustang
The title image shows an out-of -the-box Airfix 1/72 P-51D
Mustang in 359th Fighter Group markings.
First I painted the rudder red, then the nose green (Testor
1/4-oz bottle generic bright green, deepened with some gloss black).
After masking these areas off, I shot the whole model in Model
Master Green Drab FD34086 as a primer/basecoat for the Aluminum,
then masked off the antiglare panel. The paint job was then
completed with a couple coats of Metalizer Non-Buffing Aluminum.
I unmasked the previously painted areas (except for the glass) and
shot the whole model with Metalizer Sealer. SuperScale decals for
“Louisiana Heat Wave” were applied and sealed with another coat of
Metalizer Sealer. After unmasking the glass and adding the landing
gear and other details, the model was finished.

Heller 1/72 Scale P-51D Mustang
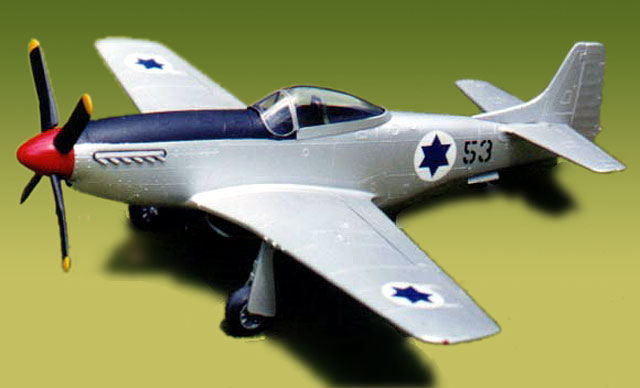
For my next Metalizer Aluminum experiment, on a Heller 1/72
Mustang, I decided to look for an even simpler scheme that could be
done without using the Sealer. A photo of an Israeli Mustang had
what I was looking for - just a black antiglare panel, national
roundels, and a fuselage number.
After out-of-the-box assembly, I masked off the glass and shot
the whole airplane in Model Master Flat Black, again as a primer.
The antiglare was masked off and the rest of the model got squirted
with Non-Buffing Aluminum. I trimmed the clear film from generic
SuperScale decals and applied them directly to the unsealed
Aluminum. The model was then unmasked and final-assembled.

The Aluminum finish looks better on this one than on the sealed
Airfix Mustang, in my opinion, but it’s still fragile. I handle it
very carefully to keep from rubbing the Aluminum off on the sharper
edges.

Conclusion
These two Mustangs aren’t the best kits on the market, nor is my
buildup of
them likely to take home too many contest trophies, but I enjoyed
building them, and learned lessons that I’ve been able to apply to
my “real” models!
Model on!