
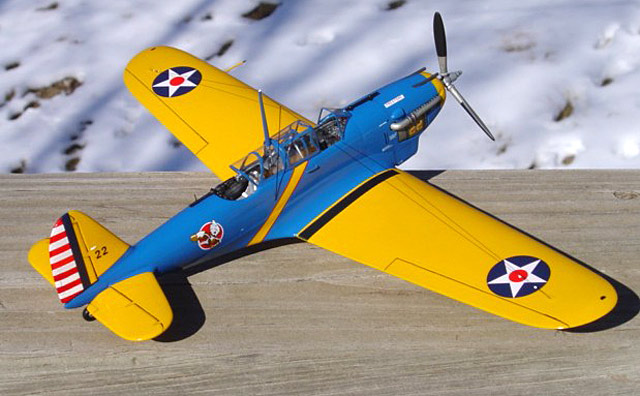
Consolidated P-30
by
Tom Teliczan

Background
The P-30 was the first production aircraft ordered by the Army
Air Corps with retractable landing gear, an enclosed and heated
cockpit (for the pilot), and an exhaust driven turbo-supercharger.
It was also the only two seat fighter to enter service with the Air
Corps.
Fifty P-30As entered service with the Air Corps in 1935, joining
four service test P-30 versions of the Y1P-25. Shortly afterward,
the P-30As were redesignated PB-2A (for Pursuit Biplace) and the
P-30s, PB-2s. PB-2As served with a number of Air Corps squadrons
including the 27th and 94th Pursuit Squadrons of the 1st Pursuit
Group at Selfridge Field, Michigan and the 33rd, 35th and 36thPS of
the 8th PG at Langley, Virginia. Some PB-2As served at various
depots until 1942.
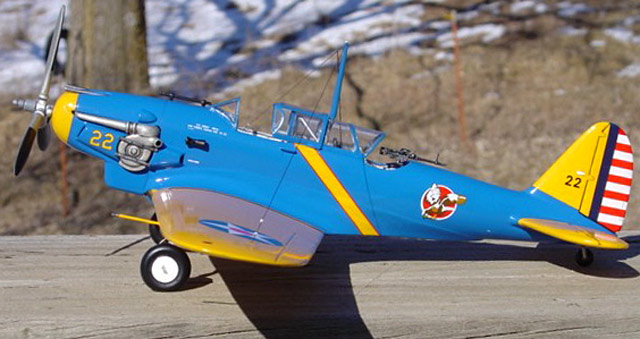
Power for the PB-2A came in the form of a Curtiss Conqueror
V-1570-61 V-12 engine with a GE form F-3 turbo-supercharger which
developed 700h.p. at 15,000 ft. Armament consisted of two .30 cal.
machine guns firing through the propeller and one .30 cal. gun
facing aft.
Max speed was 275 mph at 25,000 and cruising speed was 215mph.
Compared to other fighters of its day, the PB-2A was a fairly large
aircraft weighing in at 4,306 lbs. empty and 5,643 lbs at max load.
It had a wingspan of 43'11" and a length of 30'.

Why I decided to tackle my
first ever vac kit...
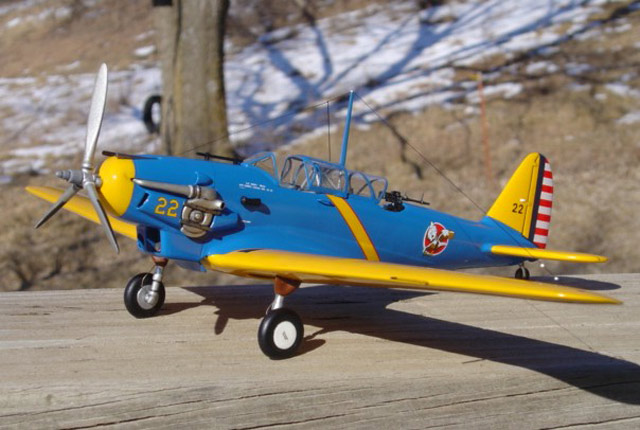
I built this Sierra vacform 1/48 scale kit as a gift for my dad
who flew in the PB-2A as a rear seat gunner.
In 1938 Hub Zemke was my dad's pilot. I've got a photo of the
side of his PB-2A and where the crew info is posted it reads:
Airplane Commander-Lt. Zemke, Aerial Gunner-Pvt. Teliczan. This info
was painted on aircraft 35-34, which was a 36th PS airplane and not
the one I built, which was aircraft 35-22 of the 27th PS.
My dad wanted the model painted up in the markings of airplane
35-22 because that is the ship he spent most of his time flying
around backwards in (150+ hours)!
I think that flying in the PB-2A was my dad's only experience at
being part of a flight crew. He really wanted to be a pilot but his
eyesight wasn't good enough for him to pursue that type of job. The
remainder of his Air Force career was spent as an aircraft mechanic
and then being involved with training. He had a field commission in
North Africa during WWII.
I think its very cool that my dad started out as a private and
ended up retiring a Lt. Colonel after 32 years in the Air Force!

Construction
Here are some specs on the kit. It's built pretty much out of the
box.
For my first vacform kit, the basic assembly went together rather
well. I had many a pause in construction trying to figure out how I
was going to build up certain pieces, then areas and finally how it
was supposed to all fit together-i.e., which step came when!
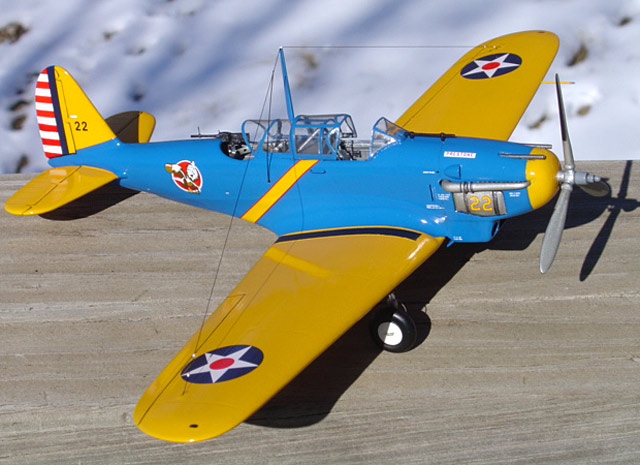
I substituted the kit vacuum formed wheels with some Hobbycraft
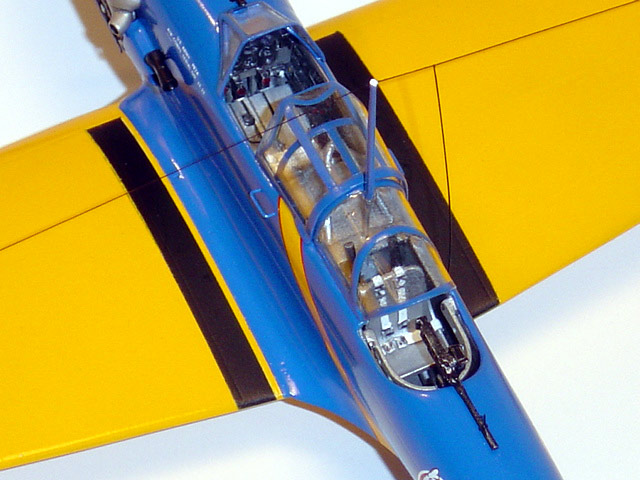
P-35 wheels and I didn't use the kit supplied cockpit sidewalls. I
used a lot of pieces from a Cutting Edge P-40 resin cockpit set to
dress up the interior. These pieces included the pilot's area
sidewalls, floorboard and the pilot's seat. The CE pieces had to be
modified in order to fit the shape of the PB-2A. I did use the kit
supplied instrument panel but I also modified it by adding some fuel
selector and magneto switches. The gunner's area is pretty much
stock including the sidewalls and floorboard. I added some True
Details seatbelts to the kit supplied seat and added a couple of
tiny pieces of stretched sprue to the machine gun for sights.
The forward firing machine gun blast tubes, the radio mast inside
the glass area and the pitot tube are hypodermic needles. The oil
cooler inlet was given some depth by cutting a drinking straw to
shape. Sheet styrene was used to box-in the coolant radiator inlet
and the intercooler inlet in order to give them some depth. Tiny
pieces of sheet styrene also make up the longitudinal braces on the
turbo-supercharger. I used a super fine mesh screen for the oil
cooler, coolant radiator and the intercooler to give the illusion of
cooling fins. These screens were super glued onto a piece of sheet
styrene and painted flat black. Once the black was dry the mesh
detail was picked out by dry brushing them with silver.
Brake lines were made from strands of fine electrical wire. The
wintip-to wingtip antenna was made using a super fine filament
called "Invisible Thread". The vertical part of the antenna is
stretched sprue. Fine piano wire was cut and bent to shape to
simulate the grab handles on the fuselage sides.

Painting and Markings
I airbrushed Floquil Conrail Blue and Railbox Yellow for the
exterior colors. The diagonal strip was masked off and painted
yellow the same time the wings and tail feathers were painted. These
colors were sprayed on flat and then gloss coated using Testors
gloss coat lacquer. The exterior canopy frames were hand-painted
blue and the interior frames hand-painted silver. The interior was
painted with regular Testors silver out of a spray can and then
highlighted with a flat black wash. The exhaust system was also
highlighted with a flat black wash. All markings used were with kit
supplied decals. The markings on my kit represent a PB-2A of the
27th PS, 1st PG out of Selfridge Field Michigan, 1937.
Being my first vac kit, I was leery of doing it. I had many a
mental block while working on the PB-2A. Sometimes I wouldn't touch
the kit for weeks! As a result, it took me approximately six years
to finish this airplane. A lot of times I just wanted to put it back
on the shelf and forget about it, but since I was building it for my
dad.............This project was definitely a "labor of love"!
Home
What's New
Showcase
Workshop
Products
About Testor
Search
Links