
Description
The XP-56 was Northrop’s response to a 1939
proposal for a high-speed fighter of “entirely new design.” The
other contenders were the Curtiss XP-55 and the Vultee XP-54. All
three designs featured pusher propellers, the goal being to reduce
drag and allow space in the nose for weaponry.
The XP-56 design incorporated a number of
unusual features. It was powered by a rear-mounted R-2800 radial
engine driving counter-rotating propellers.
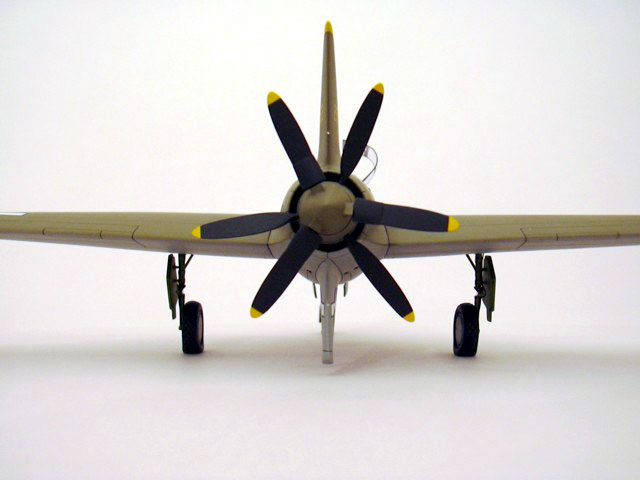
The long, swept wing featured elevons (serving
as both elevators and ailerons) and split rudders, which were
operated by airflow through “aero boost ducts” on the wingtips. The
XP-56 was intended to carry four .50 calibre machine guns and two
20mm cannon, although these were never installed.
Two prototypes were built, but tests revealed
that Northrop’s design possessed some rather unpleasant flight
characteristics. The first XP-56 was destroyed on its fourth flight
and the second was grounded after only ten flights. Work on this
project was not wasted, however, as Northrop used the knowledge
gained from the XP-56 when developing the XB-35 a few years later.

Construction
A year or so ago, Hyperscale featured a very
detailed and positive
review
of Czech Model’s 1/48 scale limited-run kit of the XP-56. Since
getting back into modeling a couple years ago, I’d wanted to try my
hand at a limited-run kit. The XP-56 seemed like a relatively
simple one to start with.
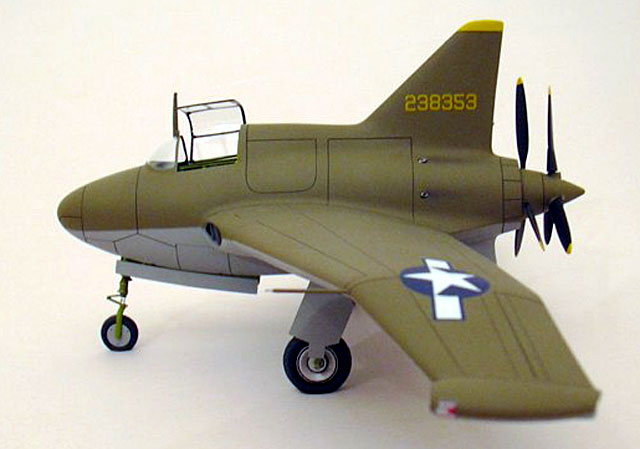
The review here on Hyperscale includes a very
detailed explanation of what is in the kit. I was unable to take
any construction photos, so I would refer you to this excellent
article for a description of the interior bits. I will just try to
explain some of the steps I found to be a bit challenging.

Wings
All the wing components fit together rather
well. The kit includes well-detailed resin inserts for the wheel
wells and cooling intakes at the wing roots. Both fit nicely,
although I did have to sand down the backside of the wheel wells
quite a bit so that the wing halves would fit together. Just to
spruce things up a bit, I added some wire mesh to the cooling
intakes and nav lights to the wing tips.
Almost as an afterthought, I decided to check
the fit of the main landing gear before proceeding with the rest of
the kit. The main gear on the XP-56 was a double-jointed affair,
similar to that on the F8F Bearcat. To replicate this, Czech Model
molded each main gear leg in two parts: an “L” shaped bracket that
attaches to the gear well (in two tiny spots), and the gear leg
itself that attaches to the bracket (again, in two tiny spots).
This seemed like a rather weak setup to me.
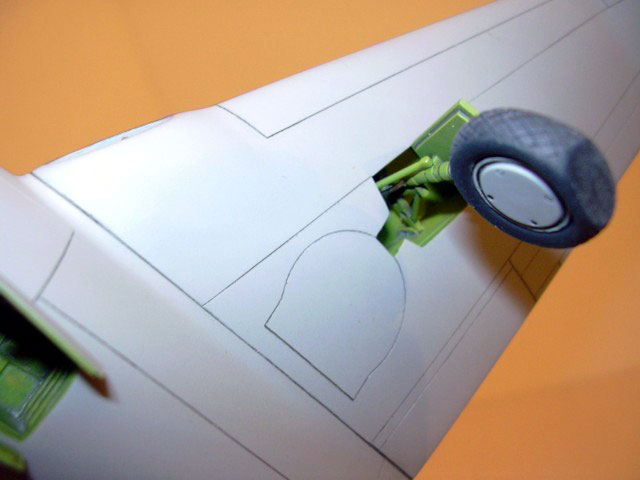
After pondering it for a while, I decided to
drill a hole in the top of the gear leg and insert a length of brass
tubing, basically extending the length of the gear leg. I then
drilled holes through the “L” shaped bracket directly into the resin
gear well. Later, during final assembly, I was able to mount the
extended main gear directly into these holes. This ensures that the
gear is solidly fixed to the wing.

Fuselage
Next came the fuselage and cockpit. The main
components for the cockpit are three large resin castings: the
cockpit floor and aft bulkhead, both of which fit over the nose gear
well. The only guide you get in positioning these pieces is one
small raised ledge on one fuselage half. After several frustrating
minutes of trying to dry fit the interior bits in place, I took my
best guess and tacked them together using small dabs of CA. It took
a couple tries, but I finally positioned them to my satisfaction. I
then used liberal amounts of CA to firmly join them together.
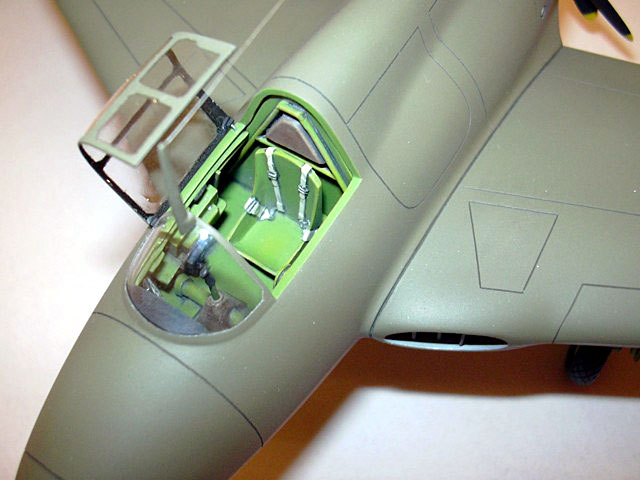
The only other major challenge in the cockpit
was the instrument panel. Czech Model provides this in three
pieces: a center panel and two small side panels. Again, there is
very little indication of how these are supposed to fit together. I
had no photos of the prototype cockpit, so I just took my best guess
and installed them so they looked about right.
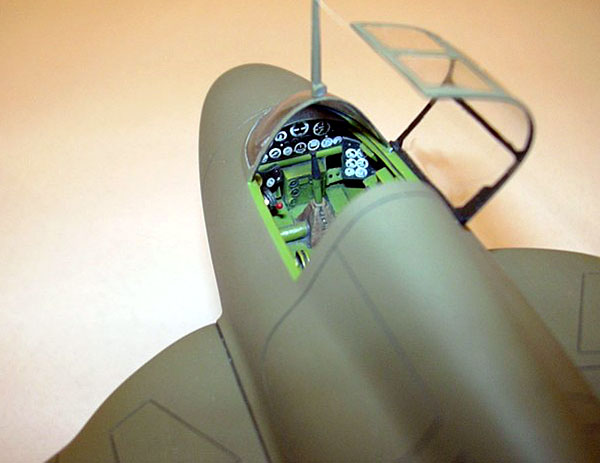
Once all the cockpit pieces were installed, I
painted them (again, taking an educated guess as to the proper
colors) and used a dark gray watercolor wash to accent all the nooks
and crannies. I used some ProModeler decals for the dials on the
instrument panels. Sometimes, these look a little too bold to me,
but they sure are a lot neater then anything I could paint.
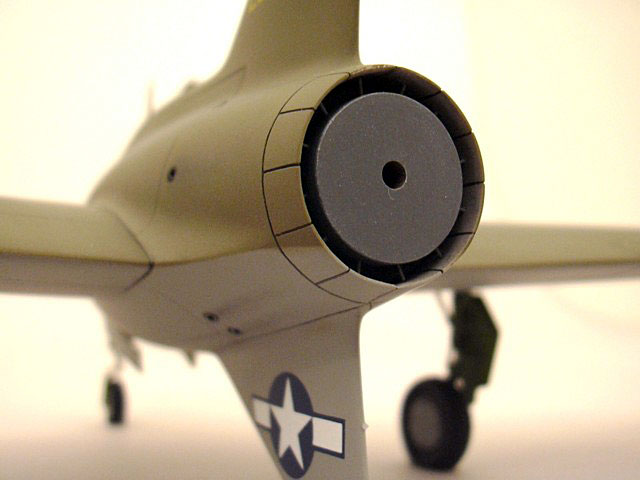
Next, I tackled the engine exhaust stacks. The
XP-56 was powered by a radial engine buried inside the fuselage.
This configuration resulted in a prominent ring of exhaust stacks
around the rear of the fuselage, represented on the kit by simple
depressions in the plastic. I drilled out these dents and used
small sections of brass tubing (painted appropriately) to represent
the stacks. The tubing is held in place by blobs of Miliput on the
inside of the fuselage.
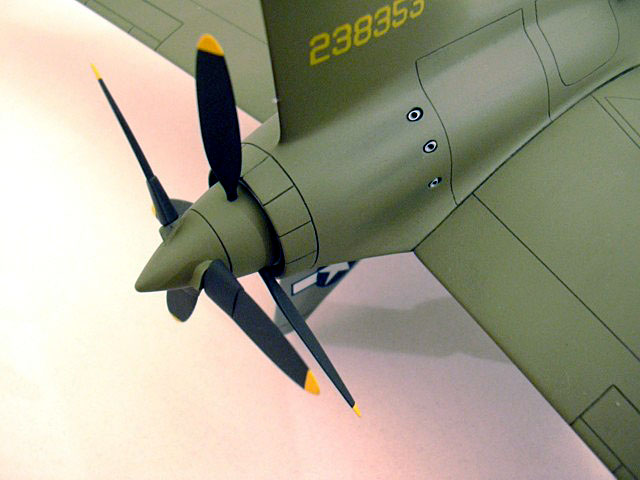
The aft end of the fuselage contains a simple
circular plate to which the propellers are attached. I used three
pieces of brass tubing, one inside another, as shafts for the
props. This allows both props to spin independently (not really a
necessary feature, but it was kind of fun to do). I also used
sections of fine wire to represent the linkages that controlled the
cowl flaps. Most photos of the XP-56 show the cowl flaps open, but
I wasn’t feeling that ambitious.
I added several lead fishing weights inside the
nose then joined the fuselage halves together. The fit here wasn’t
great, particularly along the lower fuselage. I spent several
sessions filling and sanding before I was happy with the seams.

Final Assembly and Painting
Once all the detail work and subassemblies were
done, construction proceeded rather quickly. I joined the wings to
the fuselage and checked all the seams. I also took the time to run
a scriber through all the panel lines. On my kit, some of the lines
were rather shallow and, in a couple spots, were totally filled in.
A quick rinsing, and I was ready to paint.
I painted the lower fuselage with Polly Scale
Neutral Gray and the upper fuselage with Model Master Acryl Olive
Drab. The top of the fin was painted insignia yellow (the kit
supplies a decal for the fin tip, but I thought it would look better
painted).
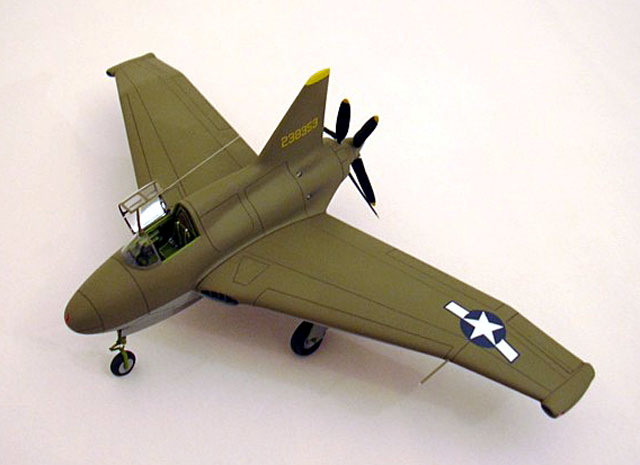
Next, I sprayed on a coat of Polly Scale clear
gloss and applied the kit decals. Then I sprayed another coat of
clear gloss to seal the decals, followed by a wash of dark gray
watercolor to accent the panel lines. Finally, I sealed everything
up with a coat of Polly Scale clear flat.
Other then some exhaust staining, I kept
weathering to a minimum since the XP-56 flew only ten times before
being grounded. After everything was dry, I attached the landing
gear and antenna, dropped in the prop and there it was: the XP-56.

Conclusions
I was quite pleased with this little model.
There are a few tricky steps, but its relatively simple
configuration (no tail surfaces, no under wing stores) makes it a
good choice for anyone wanting to try a limited-run kit. Its
distinctive shape also makes it stand out from all those other World
War Two fighters on my shelf.