Introduction
 In
Part One of “Painting Small Scale Armor” we discussed some
techniques for painting freehand camouflage and using pastel chalk
for weathering. Now we will explore some alternate methods for
painting hard-edged camouflage finishes; and different ways to add
dust and mud to your small scale tank.
Pastel chalk can produce great results, but the finish is fragile.
The chalk can easily be damaged or completely removed with careless
handling. Even the simple course of time will alter the appearance
of the pastel “dust”.
However, it is possible to obtain a more robust dust and dried mud
effect on your models.
The subject for these techniques is Emhar's 1/72 scale A7V WWI
Sturmpanzer. This is a very simple little kit with only 30 plastic
parts, but the detail is neverthless very good.
The real A7V was finished in a hard-edged mottle of red-brown over
medium green. I wanted to depict the vehicle in fairly clean
condition, but with a light coating of dust and some streaking and
other subtle weathering.

Step 1:
The first step was to add mud texture to the running gear and
lower hull of the model.
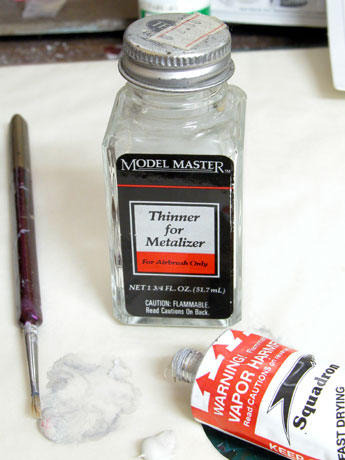
There are several ways to do this, but my favourite method is to
create a thinned putty compound by mixing Squadron White Putty with
Testor’s Metalizer Thinners. A blob of putty is squeezed out, then
the Metalizer Thinners are mixed in with an old brush. Please note
that the combination of the putty and thinners is highly noxious,
and will require plenty of ventilation!
When a fairly thin consistency is achieved, the white “mud” can
be randomly applied to the running gear and lower hull with the same
old brush. Texture can be added to the wet mix by stippling with the
brush.
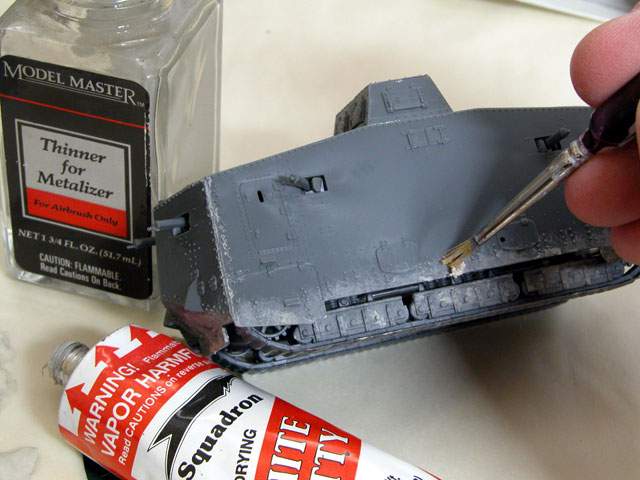
The amount of mud applied is entirely up to the modeller. For this
project I kept the effect subtle, as it was destined to depict a
little dried mud under dust.

Step 2: Pre-Shading
Painting can now commence.
I like to spray the entire model black before applying the
camouflage colors. I used the Testor Aztek A470 airbrush fitted with
the fine-line (tan colored) tip for all the spraying on this
project.
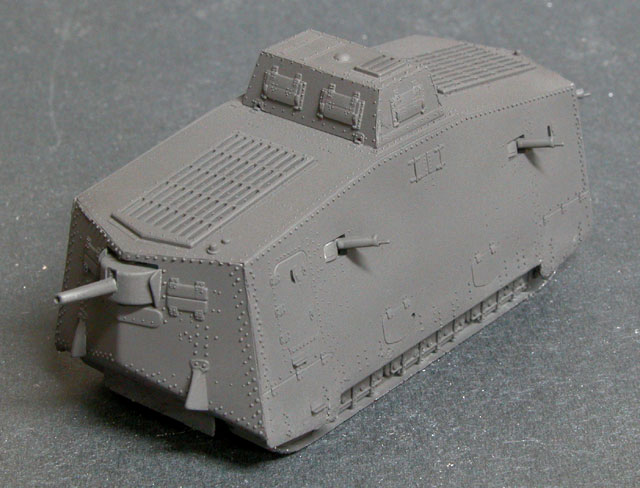
This black coat will provide scale shadows in the dark
recesses of the vehicle after the camouflage colors have been
applied. It is therefore important to spray the black into all the
nooks and crannies of the model.

Step 3: Base Camouflage Colour
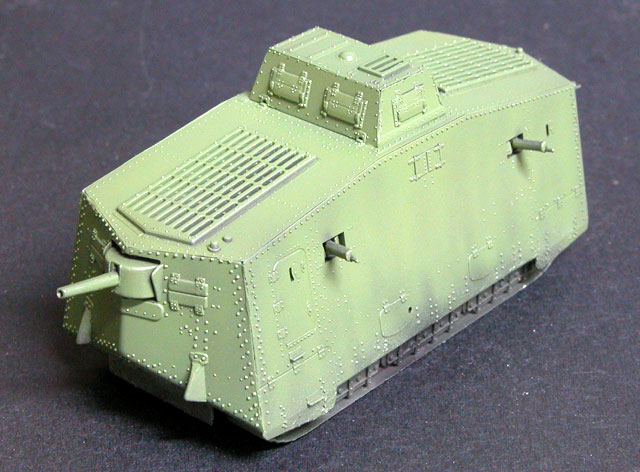
I used Polly Scale US Medium Green (an aircraft colour) as the
base camouflage coat.
This
overall camouflage color was sprayed with the airbrush held at a
consistent high angle. This left "shadows" in appropriate places. I
was also careful to leave streaks of the black undercoat visible on
the side of the hull.

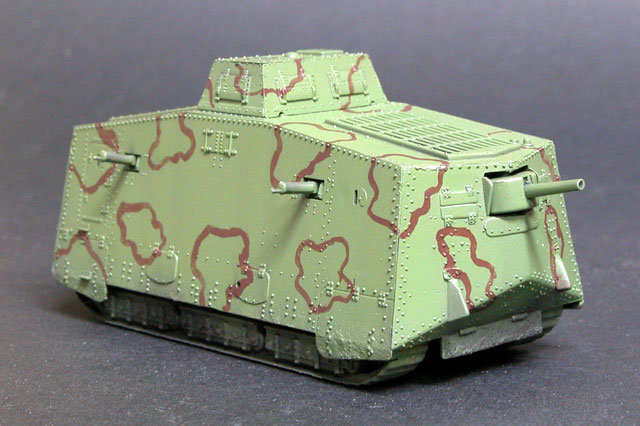
Step 4: Outlining the Hard-Edged Mottles
Instead of masking the hard-edged mottles, I decided to paint the
outlines with a fine brush. Polly Scale German Red Brown was the
colour chosen for the mottles.

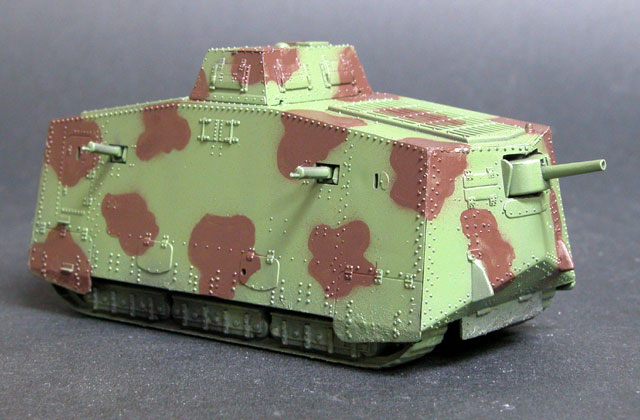
Step 5: Filling-In the Mottles
I used the Aztek airbrush to spray Red Brown inside the
brush-painted outlines. The slight overspray would later be
corrected under a coat of weathering.

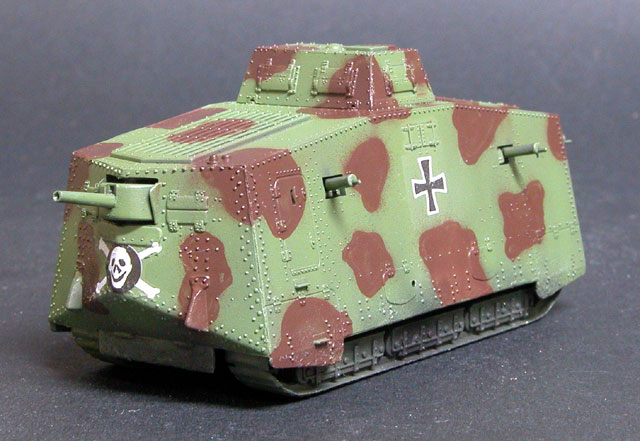
Step 6: Gloss Coat and Decals
The model received an overall coat of Polly Scale Acrylic Gloss.
When this was dry, the kit decals were applied.

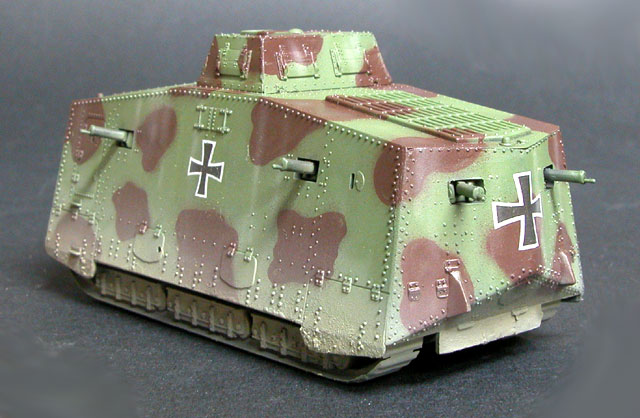
Step 7: Spraying the "Dust and Mud"
I mixed up a batch of very pale tan paint and added a drop of
Tamiya Flat Base to the paint cup. This was thinned almost to the
consistency of water using Testor's Model Master Acryl thinner.
The thin, dusty coat was sprayed over the running gear and lower
hull with a very soft demarcation at the top. The front and rear mud
guards were also thoroughly covered in this colour.
Fine streaks of "dust" were also sprayed on the hull sides
from top to bottom.

Step 8: Oil Wash
I mixed a wash from Raw Umber oil paint and odorless thinners. I use
oil paints from the Rowney Georgian range.
This wash was applied sparingly around rivet heads, doors and
panels. I also coated the running gear in the oil wash to give it a
slightly wet look.
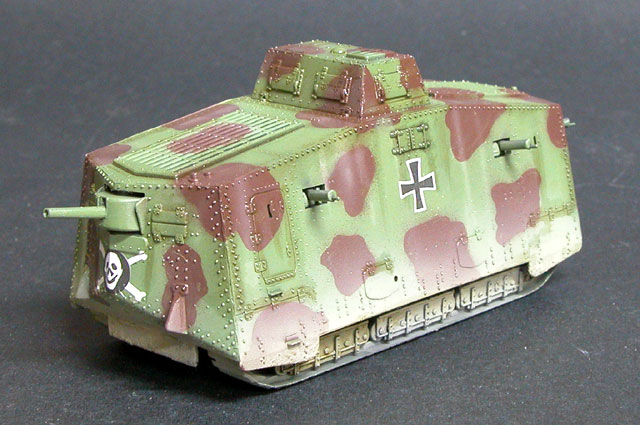
After about a half an hour, the excess wash was
blotted from the model.

Step 9: Flat Coat and Detail Painting
When dry, the wash was sealed with a coat of Polly
Scale Flat Clear.
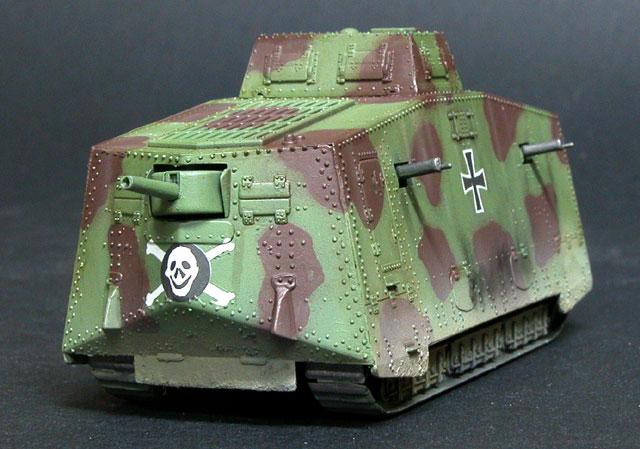
The A7V had exhaust holes in each side of the hull.
I sprayed a flat, sooty mix of black along the hull side to depict
exhaust stains.
To complete the paint job, the protruding machine
guns were brush-painted with Testor's Gunmetal Metalizer.

Conclusion
Small-scale armour models are a great canvas for testing new
construction and painting techniques. They generally do not require
a large investment of either money or time.
The techniques described in this series are only suggestions.
Feel free to experiment with methods of your own.
As always, the important thing is to have a go, and enjoy
yourself!